24.8.13

Crystal Lacquer 5 ways


Hi there today I would like to share with you my final projects for the Sakura Hobby Craft Design Team and how I used Color Crystal Lacquer Five different ways!

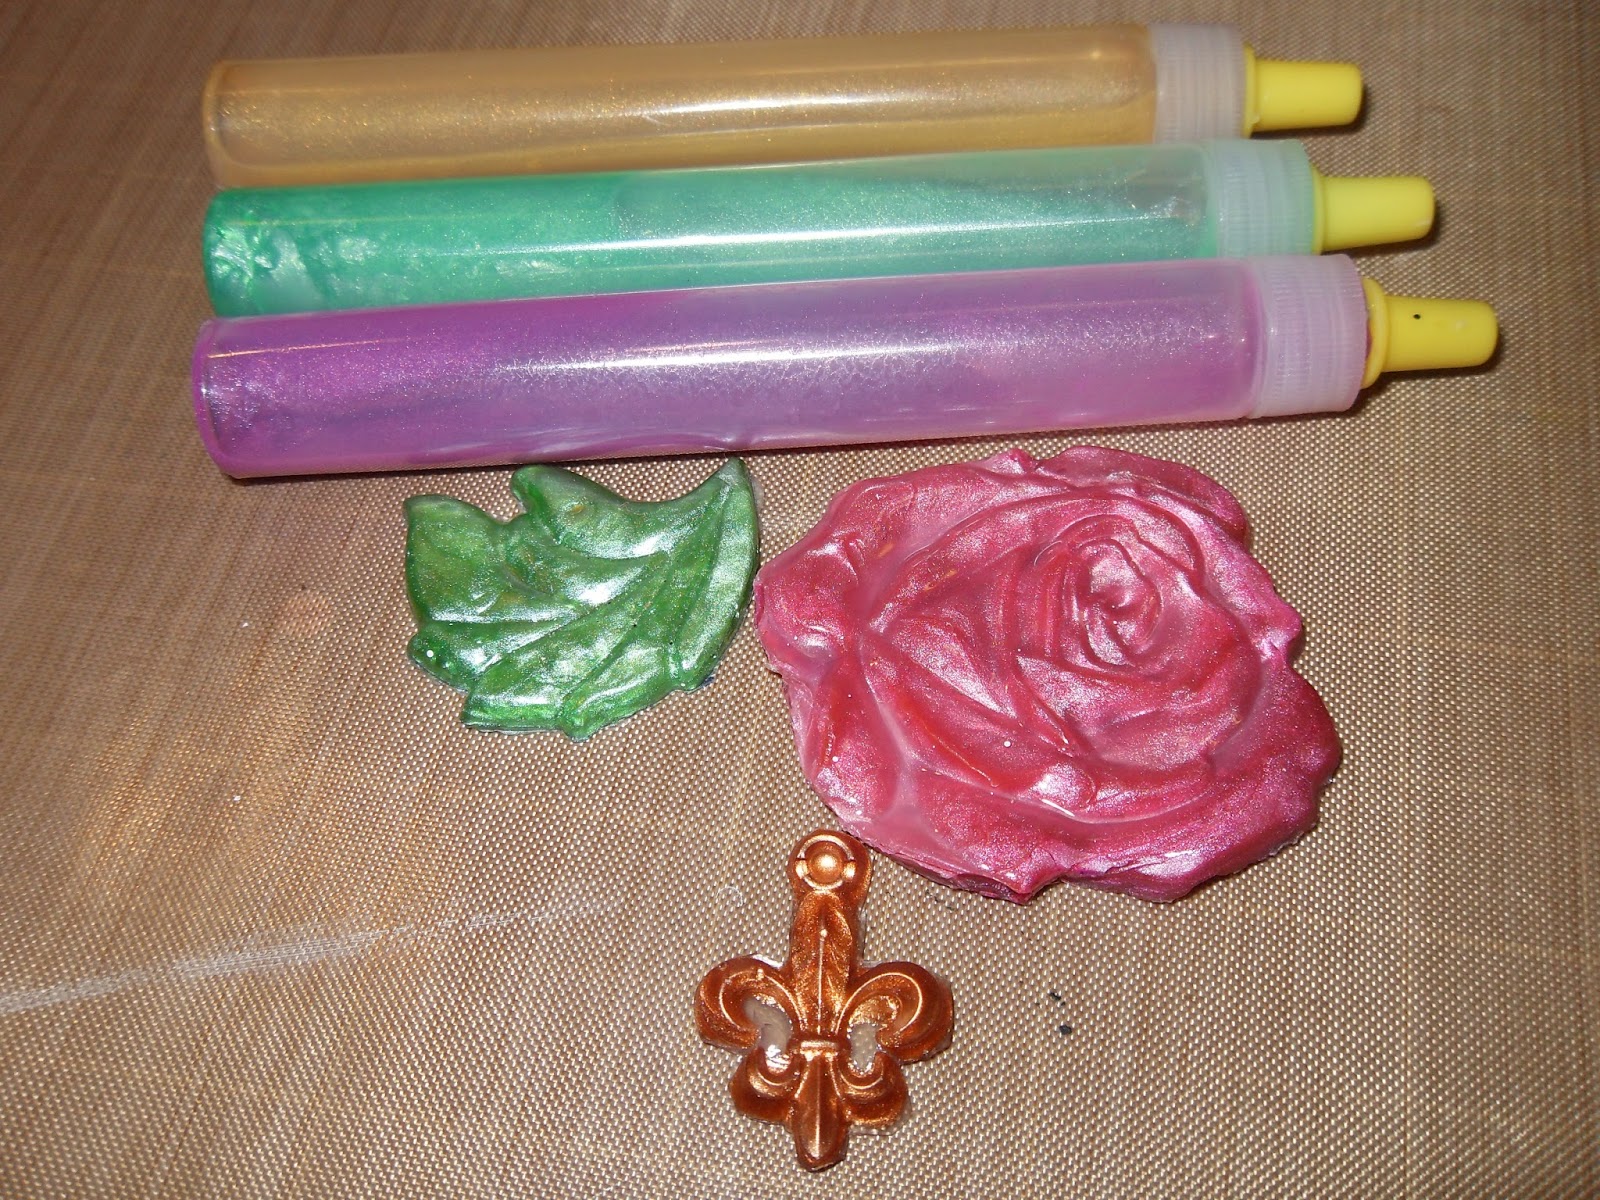
Today I am creating embellishments. The first way I used the colored lacquer is to pour it into molds.

I had some Wilton molds for cake making and I thought it would be fun to see how the lacquer would work. I tested a few ways and the best method I found was to lay a foundation of Clear Crystal Lacquer down first and let stand to get sticky before adding my Colored Lacquer and finishing off with yet another layer of Clear Lacquer. This method worked best and I let this set for about two days before attempting to remove them.
Different temperatures and climates will determine drying time.
Here are the finished embellishments of a red rose , green leaf and a gold fleur de lis.. Perfect!


Next, I used gold color lacquer to color a pillar I made out of corrugated cardboard. Since the color lacquers came with a pen like tip it was very easy to add shine and pearly gold to my hand made pillar ready for my layout.

Then I decided to play with bottle caps. The first one I added some color lacquers (Blue and Pink) to the inside of my bottle cap (used bottle cap from beer). I filled the bottom only and let the colors blend naturally. I set that aside to dry.  The second bottle cap I decided to flatten out with my Sizzix Big Shot. **Note: this will cause your plates to be cut** I would recommend placing a shim on both sides of the cap to prevent this from happening.  I placed some Color Lacquer in strips and proceeded to use a toothpick to swirl the colors into each other.
I loved it! and decided to punch a hole into the top of the flattened bottle cap with my Cropadile Big bite. I also colored the edges with a black Copic marker and added a ball chain.
The second bottle cap (not flattened) could be used for a pendant as it matches the necklace. 
Whalla recycled bottle caps into jewelry.


Next, I found some weird looking washers in my husbands garage. They reminded me of steampunk so I had to put some together for an upcoming project. I used Gold and Silver Pearl Color Lacquer. I colored the outsides and let dry. I also thought it would be fun to add a broken piece of colored lacquer from test done on the molds. It was an owl that didn't quite turn out when trying to take it out of the mold.. I never throw anything away so I decided to use it too! I glued the whole lot together with E6000 glue.

Awesome Right?

Lastly I decided to color a domino. First I stamped the domino with a dragon fly stamp with Stazon ink.
then I added some color with the colored lacquer. Here I used Blue and Pink. I think the possibilities here are endless! This could very easily be a key chain or hung as a pendant!. I am definitely going to play some more ....
I think this would make a great key chain!

I hope I inspired you today... Because it's a great time to try Sakura's Color Crystal Lacquer. You can get 20% off your entire purchase at Sakura Hobby Craft for the month of August.  Just by entering this code:  aug08    at checkout! 


3.8.13

Coloring with Crystal Lacquer Pearl and Metallic Pens

Hi! Today I would like to show you how I used Metallic &
Pearl Crystal Lacquer to create an embellishment and main focal image for a card.

List of supplies used today are:
Acetate
Image Stamp to color
StazOn Ink
3D Metallic & Pearl Crystal Lacquer
Card Base
Card stock
Patterned Paper
Sentiment Stamp
Embellishments

I started with a piece of acetate (packaging) and
 stamped a butterfly to color with my metallic/pearl pens.
I chose to use a complimentary color of permanent
StazOn Ink. I chose StazOn Ink so it wouldn't smudge.

Next I turned my image over to color it.
I used each color in the set. When it was dry I turned my image back over to
reveal the lines of my image with my vibrant pearlized colors visible.
Then cut out the image leaving approx. a 1/8" edge around the stamped image

I layered my card stock and patterned paper on my card base.
I used pop dots to adhere my butterfly in the center small enough not to show through.
I added the rest of my embellishments and stamped my sentiment at the bottom.
The inside of the card has a lovely Serenity Poem.


 Here is a close up of the butterfly. (hard to capture on camera)

You can purchase the Crystal Lacquer I used and so much more at
Don't forget that you will receive 20% off your entire order for the month of August when you use this code aug08 at the checkout!