25.1.17

DIY Decor with Craftwell USA

 Hello! Today I would like to show you my DIY bathroom decor piece. 
Today's supplies include: 
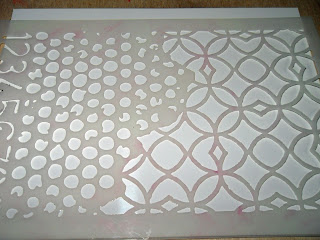
Potpourri bag of assorted shapes to airbrush
Driftwood
Gluegun
Alcohol Marker

Below is the bag I started with of Potpourri nicely scented for my bathroom. 
 I used my eBrush  to give the purple and pink shades I needed for my flowers. I held my eBrush 12inches away from my flowers and gave them all a kiss of pink and purple. I love how some came out lighter than others for a variation in color. 
Next it was time to glue down the pieces of potpourri onto the piece of the dried driftwood. 
 And that is it! I have a beautiful piece of placed flowers and sponges that smell great too!
 This is my result. 


 I hope you enjoyed todays DIY and encourage you to check out our blog at http://blog.craftwellusa.com/


Warmly,
Peggy Oliver

21.1.17

Y did you buy that!


Hi Crafty Folk! I would like to share with you my "Y did you buy that" for the Sisterhood of Snarky Stampers.  Here I am showing you my World Tour Stamps from Inkadinkado purchased several years ago and never used.
Apparently I thought I would be going on a world tour sometime soon and 
so I purchased these stamps.. 6yrs later... lol 
So I made this 2Bach World Tour Tag For a Backstage Pass to all the inside scoop.lol 

I hope you enjoyed Challenge #76 Come on down to join us and post your entries!

18.1.17

Stencil Texture Building


Hello Peggy here to show you my stencil fun over the weekend. 
Today's supplies include: 
Markers
Adapter
Tags/Paper
Embellishments
Stamps
Stencils
Ink
 I chose to whiten my tag and painted it white but this is your preference.  I started with my tag. I used one stencil for this tag and I wanted a shabby pink look so pink it was.  I airbrushed my tag with my stencil using my eBrush. So simple and quick! Then it was time to embellish.  My eBrush made this process so easy my seven year old can easily handle this machine. I love my final result. 
 Next I chose a few different stencils and mix and matched as I airbrushed and turned my stencils to create this fabulous background paper to emulate those Northern Lights we get in Canada. I had the perfect stamp of trees in the foreground.  This example uses four colors of markers and each time I used my eBrush to change colors I also changed the direction of the stencil.
Here is my result.. 
 I hope you enjoyed my stencil play! I recently cleaned my space and WOW I have a ton of stuff I had forgotten about. This let to play of course.. I hope you enjoyed this read and I encourage you to try out the eBrush. This tool is just too fun!!

Warmly, 
Peggy Oliver


12.1.17

DecoArt Media Line


Hello Peggy here to show you how I made this canvas texture with DecoArt Media line. 

Today's supplies include : 
Tissue Paper
Mini Art Stones 
Canvas 
Acrylic Paint
Paint brushes

I blended some Media molding paste with my mini art stones until my desired consistency. Using a spatula I scraped across the middle of the prepared canvas leaving behind various levels of texture. Next I used matte medium to glue down some tissue paper. I just used what was on hand. In my case it was a pattern that I then covered in white gesso on the top half of my canvas. 
 I let this dry completely and started with coloring my sky with quinacridone blue, phthalo green, ultramarine blue, dioxazine violet, titanium white and gold highlights. I determined my skyline and when from there.


Brought to you by DecoArt blogger outreach program.