Showing posts with label eBrush by Craftwell USA. Show all posts

26.4.17

Owl Always Love Whoo

Hi Today I am showing a card using a coloring book image cut and colored. 
Supplies used today are: 
Alcohol Marker
Cardstock
Ribbon
Patterned Paper
Easy background coloring made in a jiffy. I colored my focal image with alcohol markers and out lined some of the leaves and left parts white/blank. Then I used my eBrush to color in all the white areas. I could literally get a fine mist of color onto my paper and it took about 10 seconds!.

 I cut and layered all of my patterned paper onto thick cardstock card base and placed some ribbon and within 15 - 20 mins I had a card ready to mail off.
Have a great rest of your week! 

Peggy 

19.4.17

Thank you flowers

Hi Peggy here and today I am going to show you my handmade flowers using my eBrush and background paper using my cut n boss electronic embossing machine. 
Supplies used today: 
markers
cardstock
stamped sentiment
ink
gel medium
flower punch/flower petals hand cut
water
glue/tape
floral wire
 I started with my flowers and petals. I eBrushed (sprayed) with alcohol markers to get different effects on each petal. Some were light on the outside and some not. Then I sprayed water on each petal and formed my petals with the bottom of a pen and rolling some over a pencil and squishing the ends to create a more natural form. Breaking down the fibers with water and a pen help to form the petals more easily. I let them dry before placing them all on top of each other and fitting them with some floral wire for stayman and gluing the centers in place.
Next I chose some complementary colors of cardstock and quickly embossed them using my Craftwell embossing folders and my Cut N Boss electronic embossing machine. I cut them all down to size to make this Thank You card.
I taped and glued everything down and for a final touch I painted the tips of my flowers with pearl metallic mica powders and gel medium.

Have a great day! Check out the store on the Craftwell site here: http://www.craftwellusa.com

15.3.17

Acrylic Dirty Pour and my eBrush


Hello! Peggy here today I am excited today to show you how I made this canvas! Supplies used today are:

Torch 
Silicone oil
Golden GAC 800 (to reduce crazing)
Kroma Acrylic Fluid Medium
Ranger Alcohol Ink (Metallic Gold)
Liquitex Ink (Cerulean Blue)
12x16 Cotton Canvas Opus Exhibition
Recycled Newspaper to catch extra paint
cups for mixing and for legs for drying


Today was the day I had to try this technique..
I created a "Dirty Pour" Mix into a cup created of Acrylic Medium, Acrylic Paint, Silicone Oil, GAC 800 to prevent crazing and Ink. Each color was created separately in a cup with oil and medium before combining into one cup. I  slowly added each color into one cup with the majority of white on the bottom. White , Blue, Turquoise and Black with Gold alcohol ink touch.
I used Turquoise Spray from the DecoArt Media line to create these lovely branched crystals.
I do not imagine any one piece the same. 
After pouring the cocktail of mixture I tipped the canvas until the edges were covered.
I quickly fired up a  hand torch and heated the canvas to create separations in paint called cells.

Then I took my eBrush and just with air starting from about 12inches  above increasing closeness until I slowly moved paint to create whispy effects such as exposing the heavier paint underneath. This technique was ever so changing and fun to watch.


 As the paint was drying I noticed very distinct valleys of texture separation.  I would think the ink mixed with medium would be thinner (viscosity)  and separated or my sea level altitude had an effect on drying time


I let this all dry overnight on the kitchen counter and woke up and hung my piece.
I love it! I will be coating this to protect it.

Check out Craftwell USA's page for your eBrush for great techniques such as this.


9.3.17

March Madness Sale

If you've been looking for the perfect deal on an eBrush, accessories, dies or embossing folders, the Cut-n-Boss, etc... NOW is your chance! Use the code PEGGY50 for 50% off your order at Craftwell. http://shop.craftwellusa.com

7.3.17

Acrylic Pour Sneak Peek #2

OMG'sh can you say cells! I love what I woke up to .. 
Well.. if you would like to know how I did this you can see my post  on
Craftwell USA's Blog next week March 15, 2017.
I will be including tons of pictures so check in! 

6.3.17

Acrylic Pour Sneak Peek

I have been working on some acrylic pouring and I will share once it is dried. This process is so fun, relaxing and freeing of control.  Check back in tomorrow! Some of my supplies include: alcohol inks/sprays as well as a couple mediums and silicone oil. And of course my eBrush by Craftwell!

15.2.17

Valentines Tag My Love

Hi! This is Peggy and I am showing you my Valentines Tag. 

Supplies used today are: 

alcohol markers
white flowers 
wood embellishment
stickers
lace 
patterned paper

I sprayed red alcohol markers on my flowers to coordinate with my papers today.  Then I created a tag from cardstock and with my adaptor for my specific marker I was able to make my own embellishments with ease using my eBrush. 


Next I layered my stickers and embellishments to create this tag. 


I enjoyed creating today's tag for "My Love".  Check out our eBrush by Craftwell Here!
I hope you had a fantastic Valentine's Day!

Peggy Oliver
Blog


25.1.17

DIY Decor with Craftwell USA

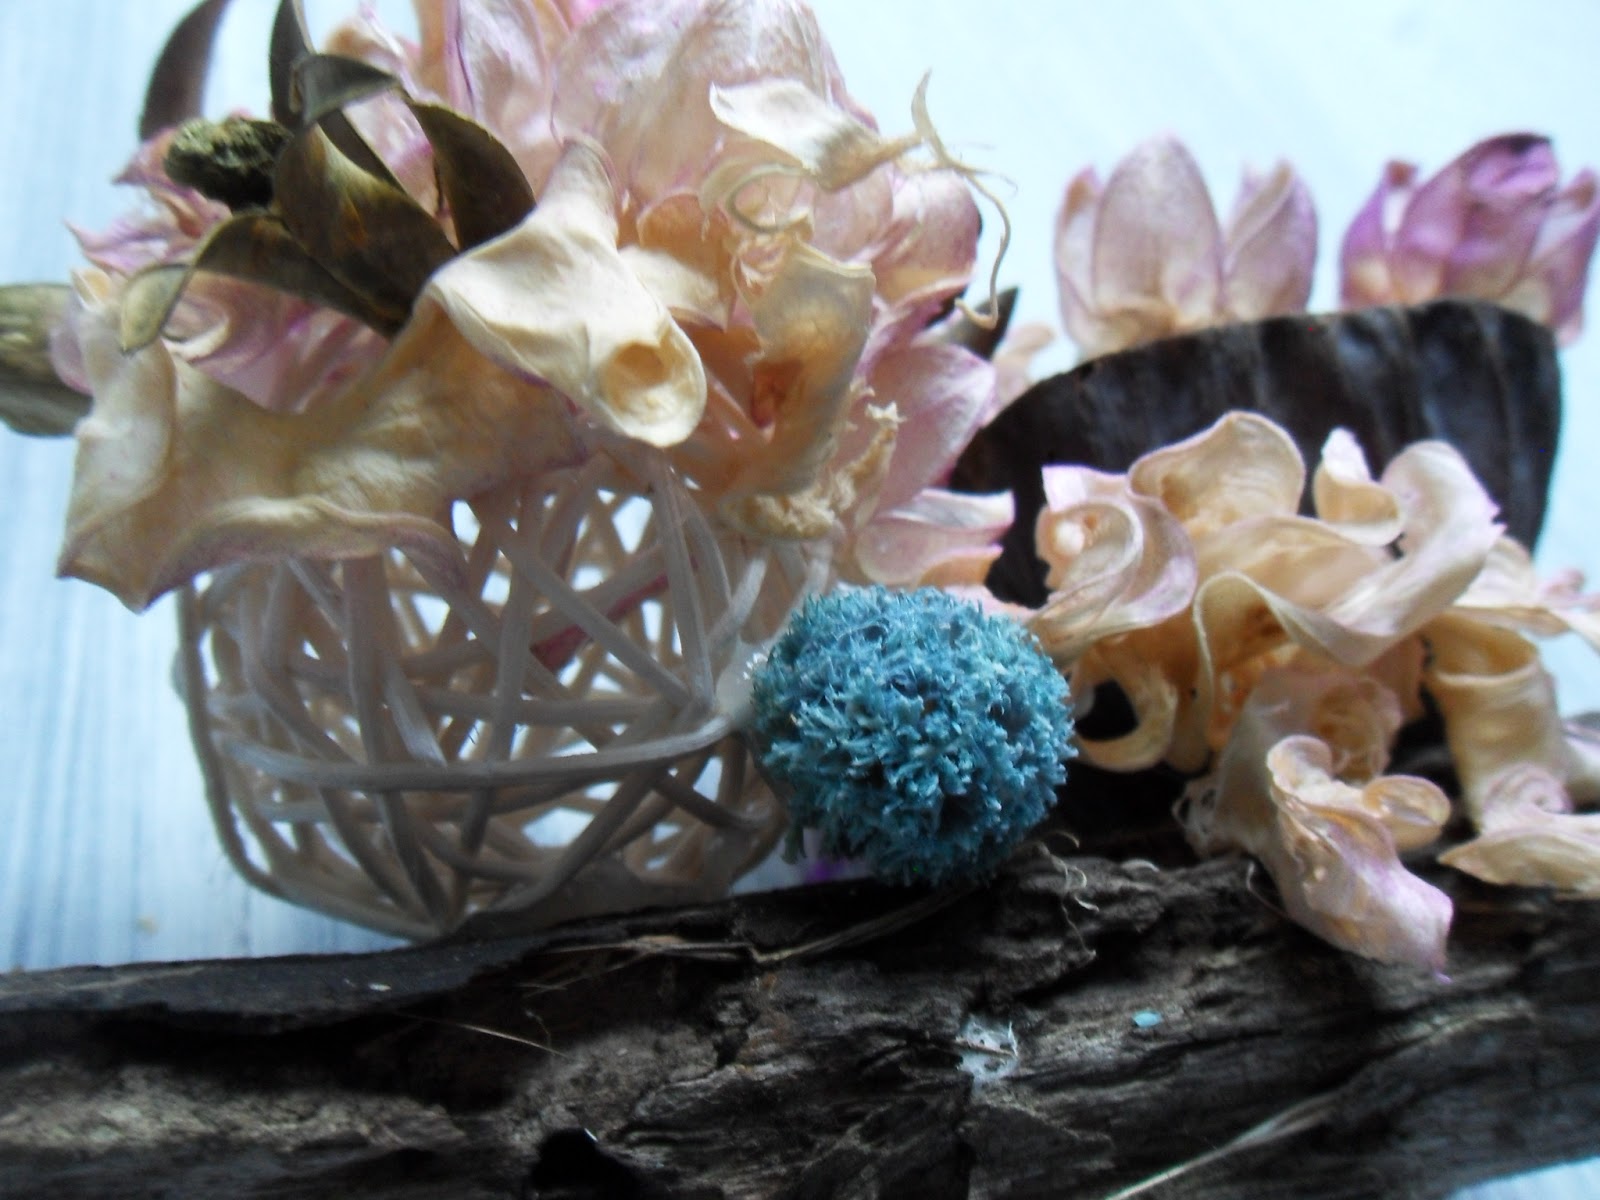
 Hello! Today I would like to show you my DIY bathroom decor piece. 
Today's supplies include: 
Potpourri bag of assorted shapes to airbrush
Driftwood
Gluegun
Alcohol Marker

Below is the bag I started with of Potpourri nicely scented for my bathroom. 
 I used my eBrush  to give the purple and pink shades I needed for my flowers. I held my eBrush 12inches away from my flowers and gave them all a kiss of pink and purple. I love how some came out lighter than others for a variation in color. 
Next it was time to glue down the pieces of potpourri onto the piece of the dried driftwood. 
 And that is it! I have a beautiful piece of placed flowers and sponges that smell great too!
 This is my result. 


 I hope you enjoyed todays DIY and encourage you to check out our blog at http://blog.craftwellusa.com/


Warmly,
Peggy Oliver

18.1.17

Stencil Texture Building


Hello Peggy here to show you my stencil fun over the weekend. 
Today's supplies include: 
Markers
Adapter
Tags/Paper
Embellishments
Stamps
Stencils
Ink
 I chose to whiten my tag and painted it white but this is your preference.  I started with my tag. I used one stencil for this tag and I wanted a shabby pink look so pink it was.  I airbrushed my tag with my stencil using my eBrush. So simple and quick! Then it was time to embellish.  My eBrush made this process so easy my seven year old can easily handle this machine. I love my final result. 
 Next I chose a few different stencils and mix and matched as I airbrushed and turned my stencils to create this fabulous background paper to emulate those Northern Lights we get in Canada. I had the perfect stamp of trees in the foreground.  This example uses four colors of markers and each time I used my eBrush to change colors I also changed the direction of the stencil.
Here is my result.. 
 I hope you enjoyed my stencil play! I recently cleaned my space and WOW I have a ton of stuff I had forgotten about. This let to play of course.. I hope you enjoyed this read and I encourage you to try out the eBrush. This tool is just too fun!!

Warmly, 
Peggy Oliver


21.12.16

DIY Chandelier Makeover

Dixie Belle Paint Company and eBrush by Craftwell USA
Hello! today I would like to show you my garage sale makeover. I found this brass chandelier that desperately needed a makeover.
Today's supplies include: 
White Gesso 
Sanding paper
Patterned paper over old cones

I cleaned my brass piece with a damp cloth and let dry.  I used my eBrush with siphon today by mixing Dixie Belle Paint (Sea Glass) with water. More paint than water ratio. I sprayed in layers my goal was not to cover the entire surface. I wanted to see a bit of the brass. I also used gesso in spots for a shabby look. 
Then I took my sand paper to spots to expose more brass bits. 
Next I took some patterned paper and wrapped it around the tube/cylinders that house the electrical for the light bulbs. 

I love the result!

This project was a little tricky to photograph but in real life this little chandelier is so cute!
Thank you to our sponsor this month Dixie Bell Paints for providing us with some fabulous paint check them out!
As well you can find our eBrush by Craftwell USA Here..
I hope you have enjoyed my tutorial and to everyone I wish a Merry Christmas!

Warmly

Peggy Oliver
Blog: http://mystampingobsession.blogspot.com