30.11.15

Christmas Banner


 Hello Crafty folks! Peggy here to show you my Christmas banner made with my eBrush by Craftwell.

supplies used today are :
eBrush by Craftwell USA
Sharpie pens
Patterned Paper
Eyelets
Sharp Scissors
Double Sided tape
3d Foam dots

I determined my size of banner by the width of the papers I had on hand. I used black cardstock to back my papers onto, so first I cut my black paper into  the shape of a banner. Then I cut my patterned paper to match. I used my eBrush to shade in all the edges with coordinating sharpie pens. 
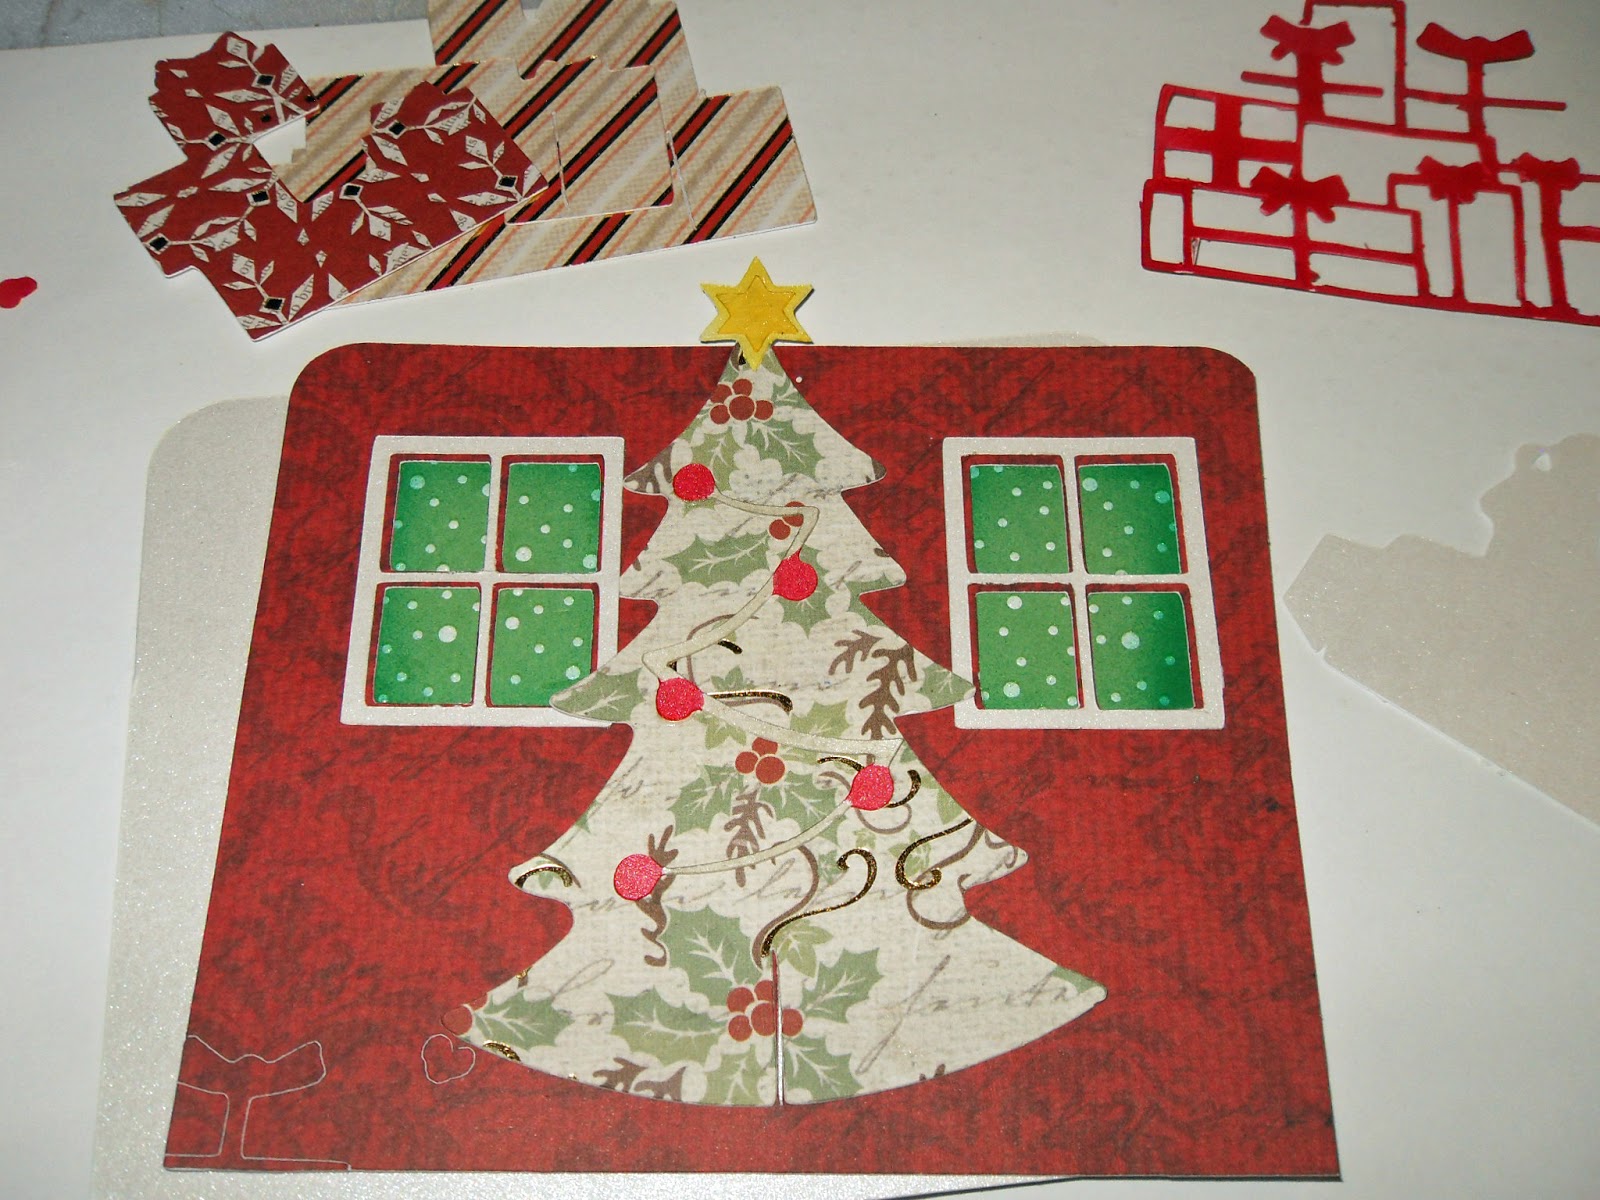
 I fussy cut all pieces from this beautiful collection from Graphic 45 papers. 
I eBrushed the edges of my pieces to make them stand out and coordinate with the dark green edges. 
I did the  same with the red.  I put them all together with double sided tape and pop up foam circles. 
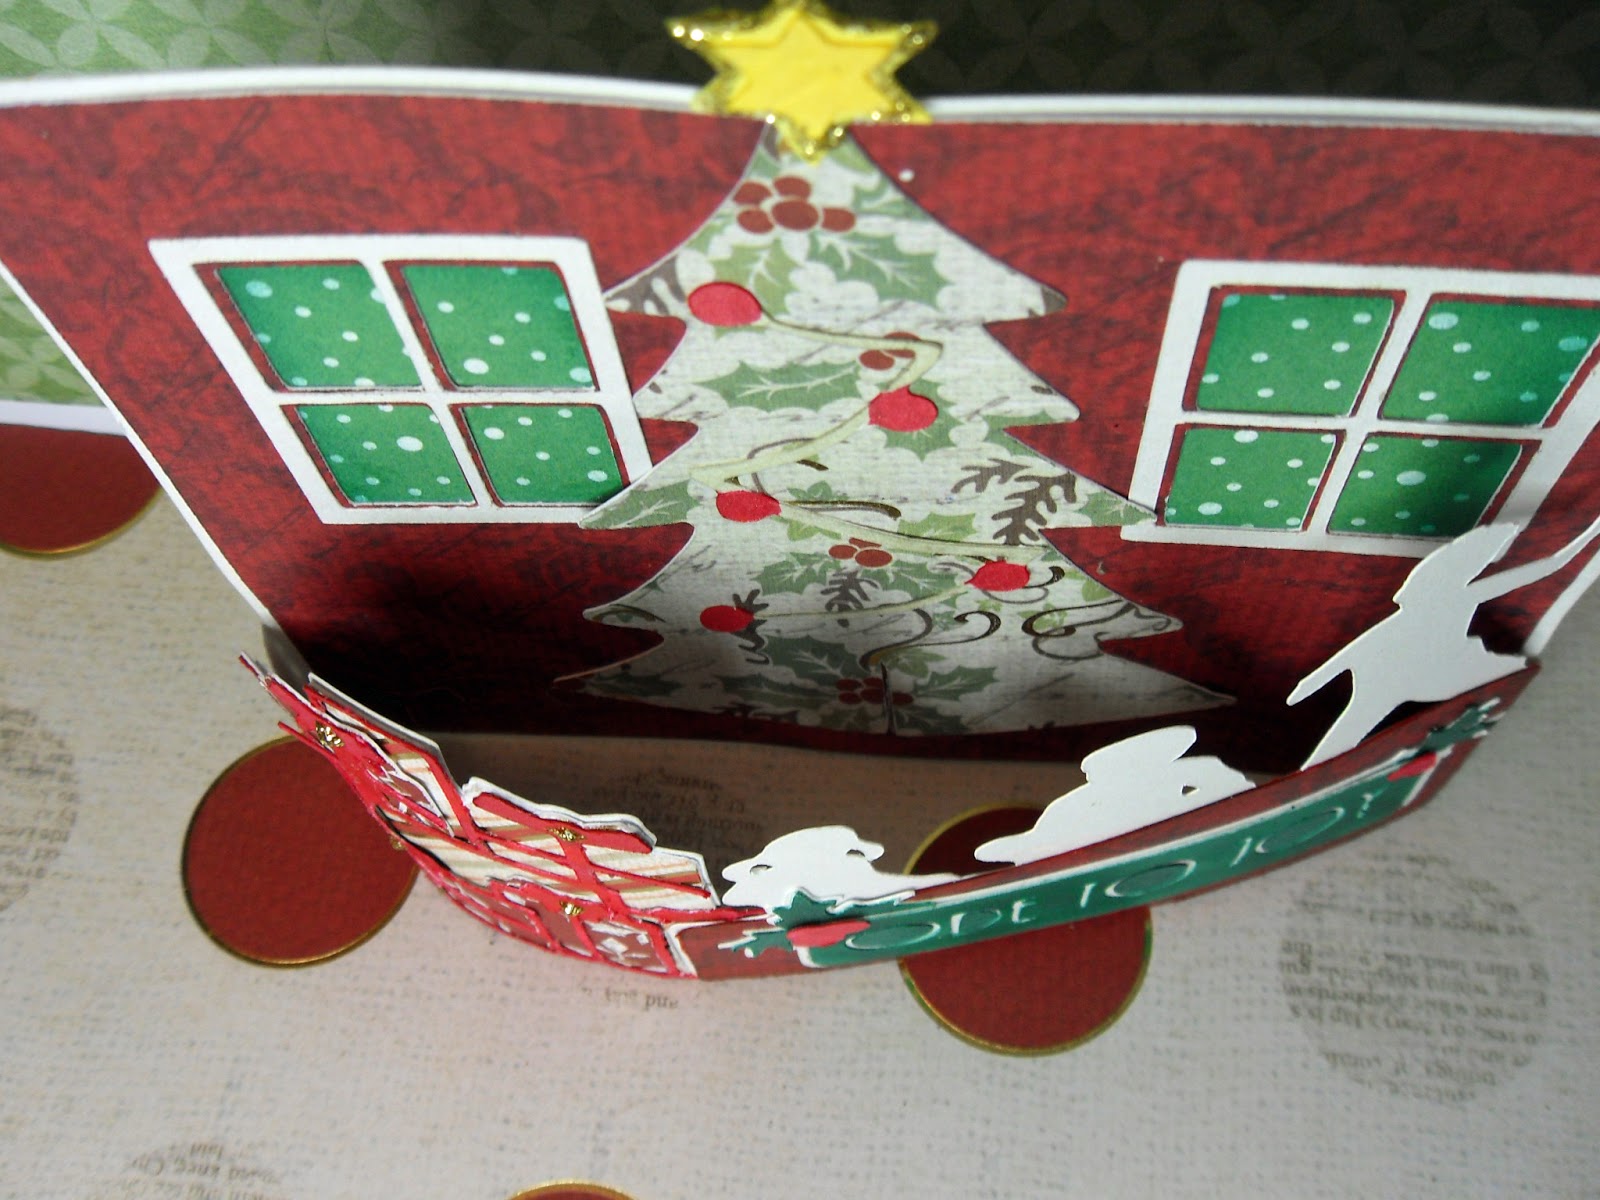
Here are the close ups of my results. 


I hope you enjoyed today's craft with Craftwell USA. 

Warmly, 
Peggy

10.11.15

Silent Night Bendi Christmas Card

Hello! Peggy here to show you my latest Christmas card using Dreaming Tree SVG files and my eBrush by Craftwell USA. 

Supplies used today are: 
Electronic Cutting Machine
Spectrum Noir Markers
white cardstock
patterned paper
Brads
Glitter
Glue

 I cut all my pieces out with my electronic cutting machine.  All of the pieces I wanted to spray I cut out of white paper.  I started with my spectrum noir markers, spraying in blue first and then black to make more of a silhouette image.  I sprayed my trees in the background around the edges to give more depth. 
 This time instead of cutting my sentiment I used a marker in place of the cutting blade and had it write instead of cut. I used a Teresa Collins "design grids" embossing folder with my Cut N Boss Machine.  Now This machine makes things easy with a press of a button instead of cranking like other embossing machines. Fabulousness! 
 I used two brads to hold my sentiment in a "Bendi" hold. The two sides of the card are glued together to make the card bendi they have slits that each side fits into. 
 And that is it! So easy! I used glitter as snow and it's ready to mail out. 
 Thanks for joining me! Come check out our fabulous machines at Craftwellusa.com

9.11.15

Bendi Card using my eBrush by Craftwell

Hello! Peggy here to show you my Bendi card it's called Ode To Joy. This card is so dimensional and versatile  as you can make it so many different ways. 
Today's supplies:  
Electronic Cutting Machine
Patterned Paper
White Paper
Spectrum Noir Markers
Glue
Stickles

I cut all of my pieces on my cutting machine and I was ready to color.  I shaded all of my patterned papers around the edges with my eBrush and Spectrum Noir Markers.  I cut out some white papers that I also eBrushed. The ivy berries, Ode To Joy Sentiment, ribbon on the presents and the star on top of the Christmas tree. 
 I use a spray box to color all my pieces. My eBrush makes it so easy and fast!
 I glued all my pieces down. It was coming together nicely.
 There you have it! all glued and colored. I used some gold stickles to enhance my ribbons and star.
 Dreaming Tree SVG's are so special. So much dimension and they fold flat to mail.

 Here you can see a better angle. The two side pieces have slits and tabs to make it easy to set up.
 Thank you for joining me today! I think I may make a few of these fabulous SVG files.


Exploring My Backyard with Susan K Weckesser

 Howdy! Peggy here, to show you my art journal page using Susan K Weckesser stamps and stencil.

Today I used "Journal doodles with a Heart" Stamps and I love them! there are 20 stamps in this package to help you journal. From flowers to leaves and sentiments too!  I also love that they come in a zip lock back for storage. This package has quality red rubber stamps that can be cling mounted.

The supplies used today are:
Susan K Weckesser Stamps Journal Doodles with a Heart
Susan K Weckesser Stencil
Journal
Lindy's Stamp Sprays
Spectrum Noir Markers
Gelly Roll Pens
Distress Inks
I used Lindy's sprays for the background and let it dry naturally.
Next I started with a fabulous stencil. I used Black distress inks with the stencil and made a border around my page.  I decided to make my own focal image and since my backyard on the ocean is full of salmon coming to spawn in the creek beside my house. I drew a salmon and doodled to my heart's content. I colored with spectrum noir markers and glued it down with glue.
 I stamped all over my page with "Journal Doodles with a Heart" stamps. I hope you enjoy my results! My doodles around my focal fish says "In my backyard Salmon are a plenty. My backyard where the bears come to eat the salmon and berries." and below reads Where The Rainforest Meets the Sea.


I hope you enjoyed today's journal page. 


2.11.15

Christmas Card with Dreaming Tree and Craftwell USA

Hello and welcome! Peggy here to show you my eBrushed Christmas Card with our November Sponsor Dreaming Tree.  These little svg's are so easy to make and fold flat to send by snail mail. 

Supplies used today are: 
Dreaming Tree SVG file
Electronic Cutting Machine
Spectrum Noir Markers
Designer Paper
White Cardstock
glue/xyron sticker machine
Gesso
Crystal fine sparkles

I downloaded the svg files from Dreaming Tree and cut them on my electronic cutting machine. I used all white cardstock except for the background patterned paper.
Now it's time to color. 

I broke out my eBrush and my spectrum noir markers and below you can see the background image. I sprayed with TB8. I made the moon edges darker to create a shadow. Then I sprayed the entire thing to make it all darker. I then needed some falling snow. I used watered down gesso on my brush and sprinkled white all over the surface.  The circle for the moon is getting put on a white card base that actually gives the card a translucent moon. If you hold the finished card up to the light you can see what I mean.  I sprayed all of my pieces of white cardstock including my leaves.
Here I used my handy Xyron sticker maker to make the fence, that was also eBrushed, sticky.

I used DR3 Spectrum Noir Marker for the fence and my eBrush. 
Once all my pieces were colored and glued together with the easy directions from Dreaming Tree it was time to put it all together! Below you can see I used crystal fine sparkles as snow.


And that's it! Here is my result!

I hope you enjoyed today's wintery card. Check out Dreaming Tree's website and Craftwell USA for more product information.