I selected six regular letter envelopes for this project
First I glued the envelope shut. Then I cut the envelope about a third and used the larger size keeping the smaller piece for another pocket. Also, I cut the edge off the opposite end to give me a tube like pocket. One end to go into the binding and one end for me to place tags.
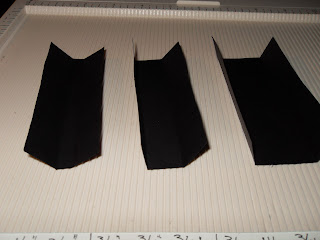
Here I cut and taped my "Stack the Deck" binding method taught by Laura on "Following the Paper Trail" sizes as shown and scored on those measurements. The length is determined by your envelope width. You want your binding to be slightly smaller to slide into your envelope.
here they are right side up ready for Stacking on top of one another smallest to largest. Then sticky taping on each edge.
Here shows each edge taped after stacking and now placing the envelopes inside each edge.
now placing my tube like envelope into the binding and adhearing to the sides of each edge.
This is what it should look like after all six envelopes are inserted into the binding with equal distribution of pages.
Here I have prepared a chipboard cover. I measured my envelope widths and left a quarter of an inch above/below and on the sides of my covers for embellishment room.
I chose some patterned paper to cover it. I left two chipboard thicknesses between the back spine and the front and back cover so it would close properly. Then I folded the patterned paper over the edge and sticky taped it down. Then covered the inside of the covers.Here is my paper covered book ready to embellish.
This shows my "stack the deck binding system" ready to be placed into the book covers.
More pictures to come when it is completed with embellishments,tags and photo mats.
Most of my inspiration came from searching UStream and YouTube Videos on "envelope mini albums" and "paper bag mini's". Now I am really into making my own paper flowers for this album.


No comments:
Post a Comment