15.12.16

Home decor with DecoArt

 Hello Peggy Oliver here to show you how I transformed my dollar store boxes with my DecoArt products into a vintage storage solution. I started with a set of boxes they came three across. I glued these set of three to each other using E6000 glue.
Next I used Americana Gel Stains from DecoArt.  I applied my gel stain with a brush and wiped it off with a cloth. I did this in sections.  Below is the stain directly applied to the pine box.


Below you can see the result after wiping it off. 


This is the back of the two boxes now one and all stained.  It really looks darker in real life to resemble oak. Fantastic stain I love my results.
Here finished I applied handles to the backs of each drawer so I could slide them in and out easily and gave it that vintage feel.  This final photo shows the more true to life color

I hope you have enjoyed today's tutorial and a huge thank you to DecoArt for the Gel Stains. You can find them here: Americana Gel Stains Oak


14.12.16

Christmas Globe card


Hello and Good Day! Today I am showing my siphoned eBrush Snow globe Card using Dixie Belle Mineral Chalk Paint. 

I used my eBrush with siphon today by mixing Dixie Belle Paint (Sea Glass) with water. More paint than water ratio. I pinned my "tobe" globe onto a board standing up against the wall.  I sprayed in layers allowing not only my paper to recover but prevent streaks from dripping down the paper. I am using 120 lb white cardstock.
I used some gesso to create white snow by dotting my globe with the tip of my metal pokey thing.. lol  Then it was  time for a little reflection mark on the top I used a PITT white pen to make two little marks to imply a reflection or highlight.  I assembled my card using double sided tape and here are my results. 

Thank you to our sponsor today Dixie Belle you can find their fine paints here: http://dixiebellepaint.com/

Get your eBrush by Craftwell USA and accessories here: Craftwell USA

Happy Holidays and thank you for joining us!

10.12.16

Challenge 74 XXX Xmas

Hello today I wanted to show you my snarky Christmas card that sorta fits the theme.. 
I totally did not go XXX rated with this one but I thought I would share it all the same.. 
It made me laugh out loud.. 

Still makes me laugh out loud.. hahaha
Anyway If you would like to join the Sisters in some snarky fun join us by making your own XXX rated card you can post it to our blog: http://snarkystampers.blogspot.ca/
Join the Challenge! Join the Fun!

2.12.16

Mixed Media Supplies

Good Morning!  I would like to officially introduce my online store. I will be offering my newly designed stamps and stencils for mixed media.

Come on in and take a look around my shop!! 


26.11.16

Challenge 73 UFOs

UFO  ... unfinished object!!
well.. I have many.. and then some!
 Here is my unfinished table... where all the unfinished objects go.. sad isn't it.. 
Here lies the mini album under construction waiting to be finished.. 
so once again I said screw it and moved onto a card.. 
haha
Cheers! 

Check out my busier sisters at the Sisterhood of Snarky Stampers
and join in on the Challenge it's #73 and post your UFO's! 

24.11.16

BLACK FRIDAY SALE

Amazing Black Friday sale at Craftwell coming up! Take a peek!  http://shop.craftwellusa.com/ Don't forget to use the promo code "BLKFRIDAY2016" at the checkout!

21.11.16

Wood Sign Decor

Hi! Peggy here, today I made a wooden decor item. 
Supplies used today are 
Wood platform
Vinyl 

I started with a thin piece of discarded wood roughly 12x11. I layered a thick coating of thick white gesso with a large acrylic paint brush. I was able to create lines that simulated grain.
Next I used two colors of fluid acrylic (titanium white and carbon black)  I randomly used my paint brush as well as my eBrush to create this worn fence or board look with the grain and direction completely different than the original piece of wood.  I used my siphon with my eBrush to spray diluted paint with water to my wood piece in white to tone down the look.
I let the layer dry. I painted the lines across to separate what looks like boards and added marks where rusted nails may have been.

I used my cutting machine to cut out this saying in Vinyl and placed it in the center of my board using transfer paper.


Check out this machine!! Christmas must have for any crafter. The possibilities are endless with the siphon adaptor you can use paint or ink to spray to your heart's content or just use the adaptors that come with your machine and use your markers that you already have.

14.11.16

Christmas is coming

Hello and welcome to my eBrush play time!
Today's supplies used are: 
corrugated cardboard 
handmade paper
poinsettia to spray
sentiment
gesso
alcohol pens
Stickles
microbeads
ribbon
pearls
hemp cord

I have to get a start on these cards or i'll never finish in time! Feelin the pressure here.. 
Today I gathered some supplies for a rustic earthy kind of feel. 

First I ripped some corrugated cardboard up to make it look rough and painted it with some gesso. 

Then I took some handmade paper I had made earlier this year with some natural fibers placed in the paper before it dried. I ran that through a cutting machine to achieve the shape.Then it was time to eBrush my handmade paper to soften the edges I sprayed it with green and brown earthy tones. 

I cut a poinsettia  out of white cardstock and sprayed it with a red alcohol based marker using my eBrush.  I used stickles on the edges of the flower and gold microbeads in the center. 


I assembled my card like this!

One Christmas card down and many more to go!!
I hope you have enjoyed my tutorial today and I hope I have inspired you to create today using this fabulous go to craft item. You can check it out here: http://craftwellusa.com  

12.11.16

FairyTales


Hello! Happy Saturday.  Today we bring you Z for Zentangle
and I have made a card for this challenge with the zentangle glass reality slipper
My advise, do not wait for prince charming!..


The inside reads .. If you have lost your shoe at midnight.. YOUR DRUNK! 
Hahahahaha.. 

Well I hope you can join us down a the Sisterhood of Snarky Stampers and show us your stuff with the Zentangle theme... head on over and see what the sisters have to show you and Link UP!!

Have a great weekend everyone!!
Peggy

29.10.16

Watercolor Fun

Good Morning Saturday Crafty Peeps! 
Today I have a watercolor card and a quick tutorial on how I did it. 
Today's supplies include:
Staedtler Watercolor crayons
Faber-Castell Gelatos 
Watercolor paper
Black cardstock  
Watercolor brush
Tim Holtz Die 
Sentiment

I started by making puddles... honestly I started with no intention or expectation whatsoever and I just painted watercolor puddles making sharp edges with darker paint. It was quite fun.. 
I created a wet surface to start using my watercolor brush and water. I chose my favorite colors and what was most pleasing to my eye.  I wet my watercolor brush and painted my brush with the crayon before applying to my paper.  I used my Gelatos for the bright pinks. 
I let the entire piece dry and cut it into triangles. 
I used DecoArt Media Matte Medium to adhere my pieces to a black piece of cardstock. 
Next I used Liquid Glass on top of each triangle and let it dry completely. 
I ran this through my Tim Holtz Die tattered florals. 
Now I have the positive and negative of this piece. 
I placed my sentiment in the white space and whalla a card was born!
The inside sentiment reads : It would have been significantly easier to
wish you a happy birthday if you were on Facebook. 
I also have the flowers for another project. 
I hope you enjoyed this tutorial and have a chance to check out and/or participate in the 


15.10.16

Brains Over Beauty


Today we are being challenged with the Sisterhood of Snarky Stampers with 
Challenge #70 D is for Day of the Dead. 
I bring you some old time digi stamps from a very talented artist Guy Gondron who is still currently fighting for his life with cancer. So check out his etsy shop as he has many works for sale. 

Here is my card for the challenge #70! 
check out the Sisterhood of Snarky Stampers to see what my fellow sisters are up to and enter the challenge yourself with the inlinks on their page. 
The papers used today are from Sabor. 

Have a great weekend everyone! 

Warmly,

Peggy 


1.10.16

Happy Pink Halloween!


Today on the Sisterhood of Snarky Stampers we are going pink for halloween for Breast Cancer Awareness.  Here's a shout out to all my fellow cancer survivors. 
This is a pink pumpkin card.  I printed a coloring page onto vellum and colored the image with my copic markers. The added sentiment "Happy National Eat Your Kid's Candy After They Go To Bed Day!"  I backed that up with patterned paper and a card base. 

Check out my fellow sisters HERE. I hope you have a fabulous weekend. Join our challenge and link up with you're own take on Challenge #69 over on the Sisterhood of Snarky Stampers Blog. 

19.9.16

Adore Birthday Card

  Another brand new week! Happy Monday to all! 
 Today I bring you my Adore Birthday Card 
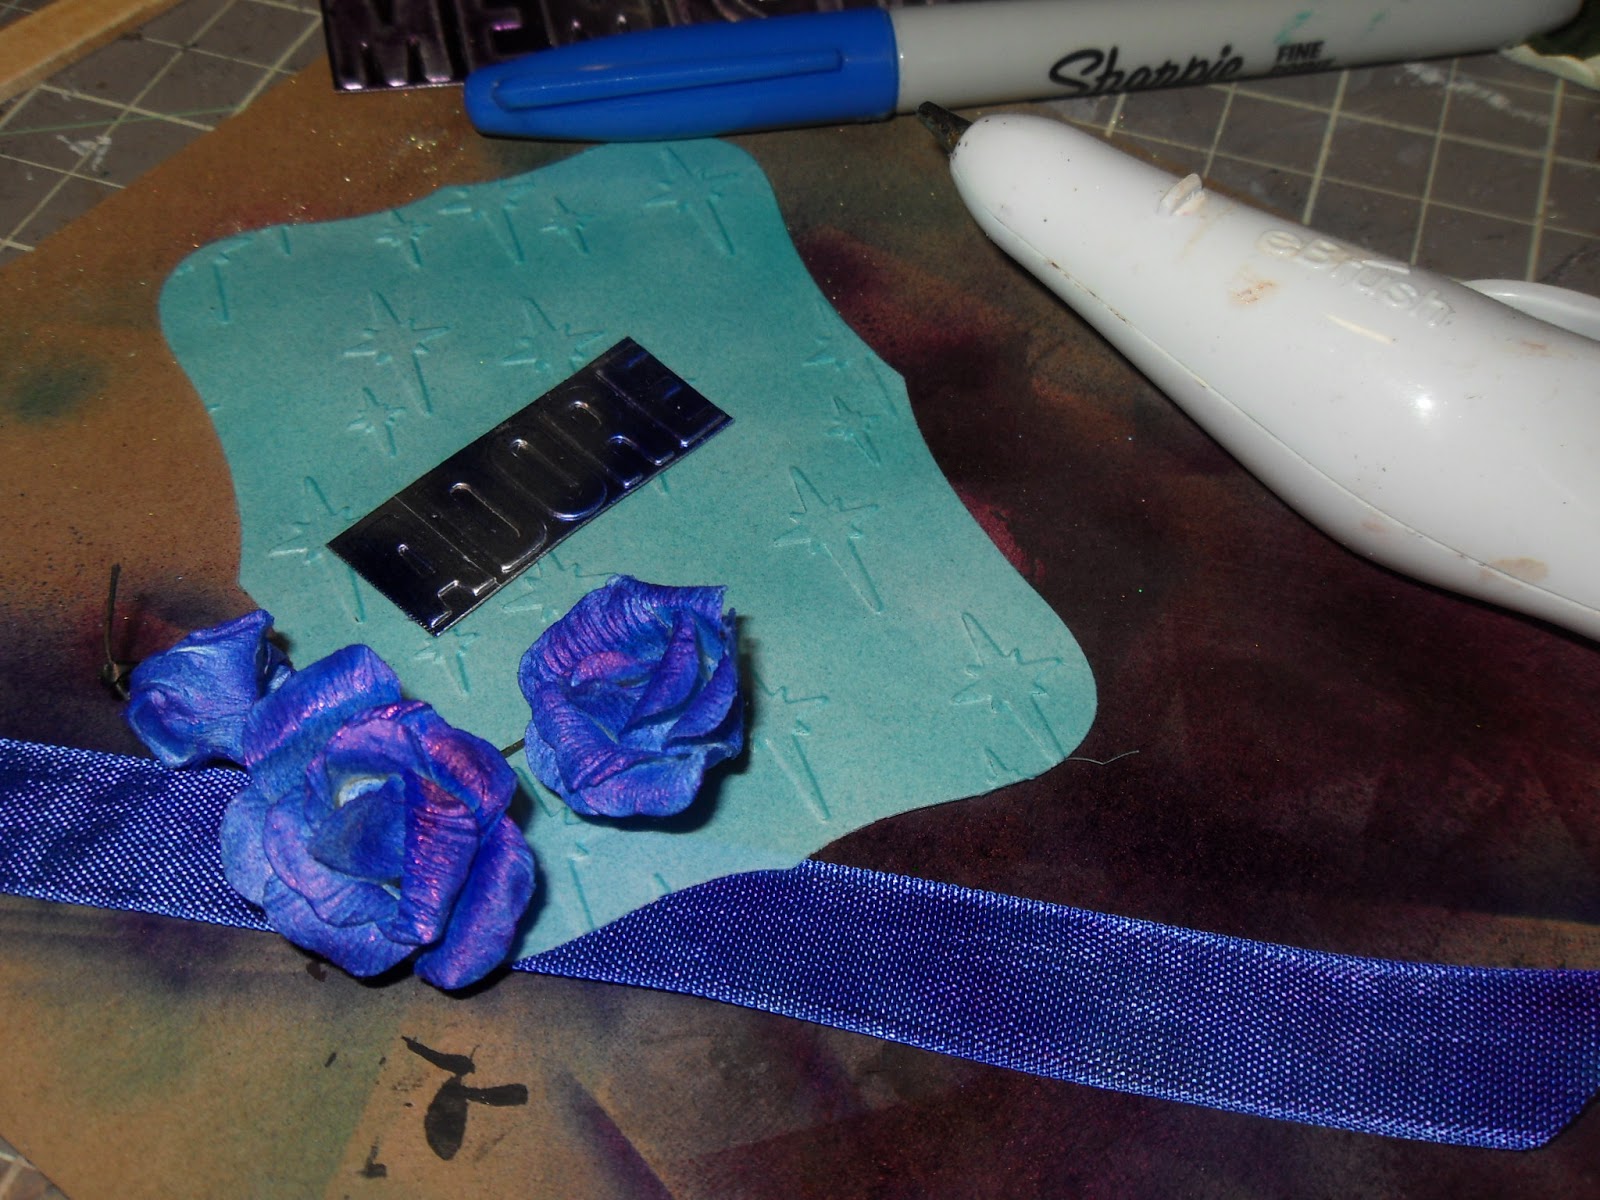
Last week I used my Cut'N'Boss with my embossing folders to create some fabulous metal words using foil tape.  I used Teresa Collins "Beautiful Words" folder.  I backed my tape on some heavy cardstock and ran it though my Cut'N'Boss.  Then I sprayed it in random spots with alcohol pens (blue) using my eBrush by Craftwell USA. Next I sanded down the tops of the raised words so only the background was colored and the metal was still visible.   


I took some Vellum paper and another Teresa Collins embossing A6 folder called "Stars" and ran that through the Cut'N'Boss effortlessly with a push of a button.  
I sprayed the vellum paper after embossing with alcohol markers in a similar blue/teal color.

Next I used my eBrush to spray the flowers and ribbon in the same blue color.  I was really surprised to see the shade of blue that came out on the flowers as they have an iridescent quality to them .. purple and blue/pink. Then it was time to layer all my pieces together to create my final project. 
 I chose a shiny embossed patterned background paper to mount my vellum and embellishments on. 
 I glued all my pieces down to create this fabulous birthday card. 


I hope you enjoyed today's tutorial And I hope you have a chance to check out my fellow DT members this week as we show you more of these great products. 
Have a great week!!

Warmly,