22.8.16

Ginger Jar upcycled to Decor

Happy Monday Morning to all!!
In keeping with this month's  Reuse and Recycle I went to the second hand store and found this. 
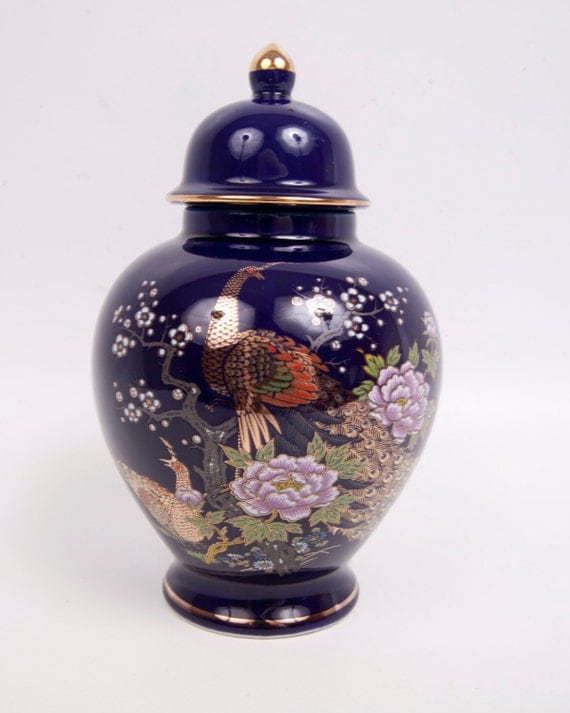
My find was apparently a ginger jar estimated $40.00 (that I found out later) lol 
I painted this jar originally with chalk paint To my dismay this left A lot of streaks. 
I sanded, rubbed and finally it came to me this must be spray painted.  
I am smart.. just not quick.. haha


Finally I took out my eBrush by Craftwell and sprayed over my streaky mess. I chose chalk paint from Americana DecoArt a color called Refreshing.  I used Debi Tullers video as my lead and watered it down a bit so it would work with my syphon.  
Lastly I used some sticky lace stencils with some white acrylic paint to try to draw attention away from my now bumpy surface.  This was a bit of a trial and error project but I thought I would share anyway.  My end result was not terrible but I certainly would have done it much differently and used my eBrush to begin with. 

 I have to admit I did not clean my equipment good enough the last time I used it and when I went to use my syphon it was clogged. I used a very thin wire for jewelry making to help me unclog it but lesson learned. When I was finished spraying this time I got some water and sprayed until it ran clear.  We had a bit of fun with this as it was so hot we were spraying our faces, it was very refreshing!

Warmly, 


20.8.16

Howl-oWeen Challenge #66 Hounds

H is for Hound is the challenge #66 over at the Sisterhood of Barky Stampers
So, I thought I would get a jump on a Howl-oWeen card since our theme is Hounds. 
I used my gelatos and some distress inks and of course colored my hound with my copics.
The inside sentiment reads:  GONE TRICK OR TREATING be back when my bag is FULL!
Come down and join us for our challenge and join in the fun! Sisterhood of Snarky Stampers
Have a great weekend!


17.8.16

1920's Box Camera Graphic45

Hello and Welcome! 
Today I would love to show you my design and take on a 1920's Box Camera.
This box can hold coasters as pictured or a mini album. 
The construction is made entirely out of black chipboard/cardstock and
Graphic 45 Communique Collection. 12x12 papers 


The footprint is 7"w x 10"L x 71/2"h
coasters or a mini album measures 5 1/2 x 7"

15.8.16

Reduce, Reuse, Recycle


Hello and Happy Monday!! 
Today I would like to share with you my plans to "REUSE and RECYCLE" a picture frame I picked up at my local second hand store. The frame I picked up was a brown well made frame with a second frame inside of the frame itself. I took out the picture that was inside the frame and took it all apart. 
I used white gesso to paint the outside of the frame and inside frame. Next it was time to go picking leaves in the yard as well as a huge leaf I picked out of my last flower arrangement from the hubby.  I layered my leaves small to big on the biggest paper I had which was a watercolor paper but I am sure you could use any kind. 

I took out my eBrush by Craftwell USA and brown markers and sprayed my top layers of leaves.  

 As I sprayed the edges of each leaf all the way around I was pushing them flat to try to achieve a crisper edge especially on the big leaf as it had the most underneath it. Once the top layer was sprayed I took a purple marker and sprayed the edges of the largest leaf.  I used the very thin stem to create a pattern on all the white space.  Lastly I tried my hand at hammering the leaves to see if they would leave a pattern.  Well, they did at the bottom of the page you will notice some green marks but not quite the result I was looking for. You can barely make out the green (not painted) leaves.  The green came from the leaf itself on the final pictures.
 Then it was time to put it all together.  I cut my paper into four pieces.  I backed them up onto black cardstock to give them each a framed look.  Before mounting onto the cardstock I used distress stain on the white edges after cutting to eliminate the white core of the paper.  With each of my four pieces ready to tape (double sided tape) I arranged them onto a cardboard backing and inserted that into my frame.  I put all of my pieces of frame back together and that's it! Wall Art!.
Reducing landfill garbage, Reusing and recycling the frame!

A bit hard to photograph as it is glass but I love it!!

Have a great week!!
Warmly,


We are having a HUGE sale check it out and use SUMMER16 at checkout!

6.8.16

Inappropriate Snarky Sister


Good Morning Saturday Peeps! 
Today I have a little snarky birthday card for that special granddaughter just to remind her .. EVERYONE in the family can and does see her facebook posts!! So, I thought I would also add a friendly reminder .. you know just in case her mother hasn't done her job as well as.. well .. me.... teehehehe :)
 I started with a tag and stenciled some texture in with molding paste.  Followed by some serious spraying in my favorite distress colors.
 I added my focal image and sentiment.. With my added P.S. remark about facebook..
Next I thought she could use that Motherly advice I was speaking of earlier.. Just in case I added this small but informative information package that came with a little rubber if you know what I mean.. lol :)
 I backed this baby up on a colorful background paper and adhered it all to the card base.

Check out my sister's posts and join in the challenge "Inappropriate" and have some fun with us!