Showing posts with label Stencils. Show all posts

20.6.18

where gelli prints and stencils meet


Hi everyone!  It's been a crazy few weeks here and crafting time has been limited, but I wanted to share this quick and fun ATC with you.
A couple of months ago I created a whole stack of gelli prints -- and began a journey creating some art in ATC size.  I still have a stack of prints, albeit it's a tad bit smaller.  So let's start there...
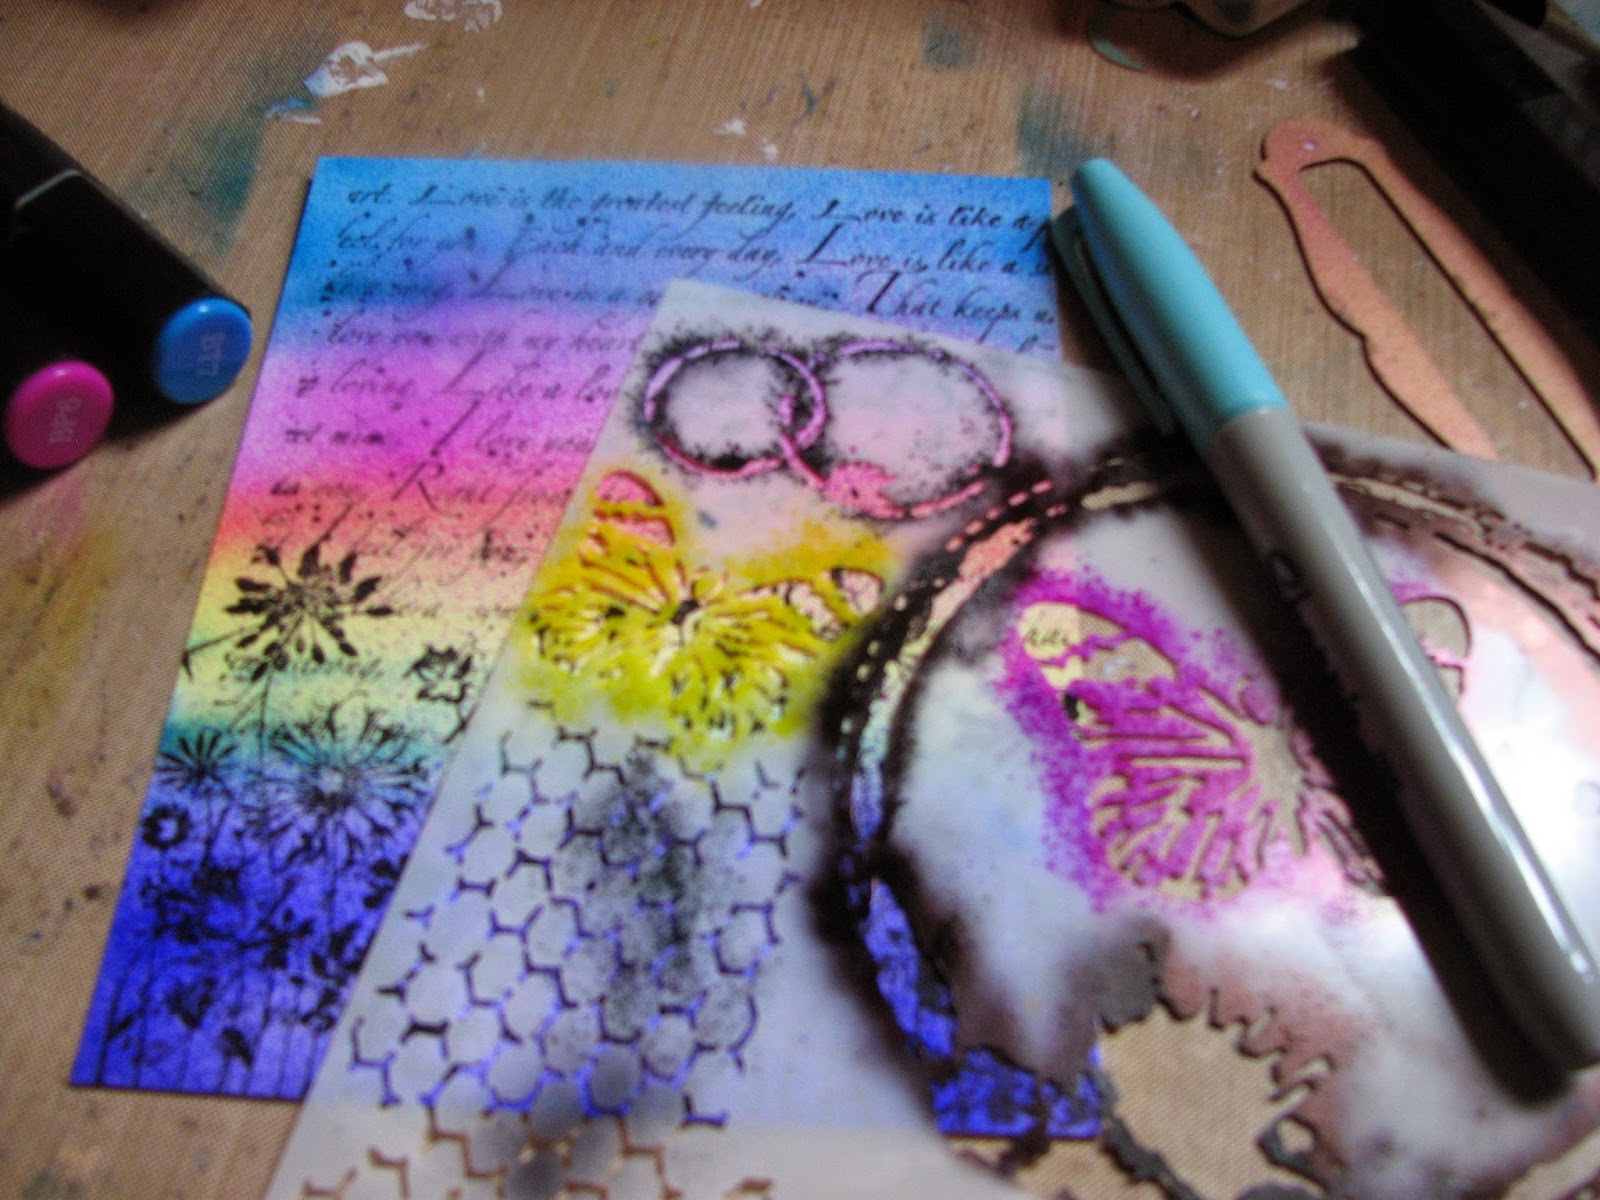
I picked one with a pink, orange and yellow base.  The colors remind me some recent sunrises here and even an occasional sunset when the colors are high in the sky.
Select a stencil.  My stencil is a new digi from Mixed Media Supplies.  I'm so excited to get to share the Alpha stencil.  There's also some numerals in the digi and it's created at ATC size for perfect use on these mini-sized canvases.
I got my eBrush out and a Tombow® marker ( which worked well with the colors in my background.  Place the stencil as desired and spray.  Reposition and spray again


Challenged to use some cardboard for another project, I cut a few hearts and removed a bit of the paper exposing the corrugated layer.  I "painted" a light coat of Gesso on the cardboard with a finger and let it dry.  Mix a little mica with some water and brush onto the dried Gesso for a bit more color and sheen.


Print and color one of the beautiful butterfly digi stamps from MMS.  I used a couple of Tombow markers on the reverse side of the vellum.  Add some Glaze to the front of the digi and let dry.


Once everything is dry, arrange as desired on your background and secure in place.  If desired, add an appropriate word or phrase to your artwork.  Sign, date and frame!


Thanks for stopping by the Mixed Media Supplies bog today.... hope you'll join us again soon and don't forget to nurtured your creative soul as frequently as possible. And if you have a little free time, feel free to stop by my blog for additional ideas and creative endeavors.

23.2.18

Clay Play #2

I'm excited to share this week's Mixed Media Supplies design team project featuring some Mica from Mixed Media Supplies.  And I've been enjoying getting a little more clay play time in these past couple of weeks.  This heart has a little extra play and was fun to create.

You'll need:
Sculpey Clay III
craft knife
background stamp
bead reamer
heart template
stencil
markers (Tombow)
eBrush
Ranger Distress Ink
mica (Mixed Media Supplies)
wire
ribbon, fiber
Wire cutters, needle nose pliers
Condition the clay.  I used a pasta machine once the clay had been warmed in my hands.  Using the template, cut the heart shape using the craft knife.  Stamp using the background stamp.  If you're going to hang the heart, be sure to add a couple of holes for hanging.

Bake as per manufacturer's instructions.  If the clay is thin, it will still be a little flexible.  Let cool completely before next steps.
Since I know that this heart will not be exposed to direct sun or outside elements, I chose some different ways to add color and a little more texture.

I chose to color using some Tombow markers and sprayed using the eBrush from Craftwell.  The two colors blended nicely.  As you can see, I also used a stencil for the "dots" and some Old Paper distress ink.
After the inks have dried, I took a small brush and applied a bit of Pearl mica from Mixed Media Supplies to add a bit of sparkle.

I also made a few smaller hearts to be used as embellishments.  They are also stamped and baked.  Colored with a Tombow marker and a little mica added to the surface. 
Add a wire hanger, hang the smaller heart with a large ring and add a bit of fiber to the wire for a little more finished look.  If desired you could make your wire a little longer and add some curls and more fibers as desired.
Hope you'll enjoy some crafting time today or in the very near future.  Keep nurturing your creative soul.


1.12.17

Mixed Media Mini Canvas by Debi Tullier

I love the Pouring of acrylics that is so popular right now. So I decided to try in a similar media.
I took mini canvases instead of pour acrylics, I decided to drop and roll the canvas to make my creation.


I started with blank mini canvases. I love the fun I had "mixing" my paints.


I used liquid acrylic paint to make my background.


Swirl, Swirl and then the background comes together!


I layered over the paint with Mixed Media Bark Background stamp
I used some metallic molding paste that I had on hand to layer over the paint and stamping. I used a gold and black ink pad.
I then placed one of Mixed Media's digital images onto my canvas to pull it all together.
I used the Geese and Tree Silhouette Stamp as my focal point. I also used some of my Playcolor Tempera sticks to tint the edges. I love the overall look and think I may make it a book cover. 

Thank you for join me today! 


16.3.15

Mixed Media Cards Layering with Ebrush

Hello Crafty Folk! Welcome to my mixed media cards.  With just a few simple tools I was able to create these vibrantly colored cards in minutes. 

Supplies used today are:
Spectrum Noir Markers
Glossy Cardstock 
Black Cardstock 
Stencils
Stamps 
Memento Ink

I started with a background stamping onto glossy cardstock cut to fit card bases made from cardstock.  Then I Ebrushed layers of color lightly for transparency. 
Next I was ready for some stenciling with Spectrum Noir Markers.
 This process was so effortless and I am fully enjoying my results. I had to make more!
Using the same process and stencils with my Ebrush!
 I made sure when stamping I used a Dye Ink so the colors from the alcohol based spectrum noir markers did not mix. My stamps stayed without smudging. 
 The glossy cardstock used makes the airbrushed colors look so vibrant. 

I hope you have enjoyed my short tutorial. 

Quick Tip:
If you like splattering ink as much as I do try holding your Ebrush in one hand and your Spectrum Noir markers in the other and blow the air nozzle directly over your marker tip and not too close you should be able to create some not so predictable yummy marks!
Thanks for looking !!