29.10.17
Mixed media layout for mixed media supplies
 Health & Fitness | Keto Diet | Nutrition | Recipes | Sports | Mental Health | Remedies | Nutrition | Vegan Vegetarian Diet | Weight Loss | Beauty Low Carb
27.10.17
Spooky Mixed Media Tag
BOO!
I am back this week with a SPOOKY tag for you!
I started out with some Distress Oxide Inks in purples, oranges, and yellow. I laid down layers lightly sprayed with water, and added a bit of Distress Ink in Blank Soot.

 I then used my Nouvo mouse with a stencil to add some texture to my tag. I was in LOVE with the blue mica powder - the shimmer was incredible
- so I lightly dusted my mousse while it was still tacky so I would get my mica to stick.

So shimmery!
so I would have a darker back ground for my next layer.


 I finally added a small stamp to a piece of lime green card stock and punched it out with a "mini" tag punch. I used a bit of lime wire to attach it all together.


I love all the layers of this project - and the mica powder adds a lot of shine !
You can find them here.

Thanks so much for checking out my project!
Love, Peace n' Ink
Amber
 I love being in my crafty space. Papercrafting is my passion!
I love peace. I love beauty. I am a mother, grandmother, spouse, artist, daughter, and follower of HAPPINESS. I am a Brave Girl.
25.10.17
Journals - For the Soul

Hi Dearies.....
Today I have two journals which I created for Mixed Media Supplies Blog......here I have used the digital printables which you can create in any form you need.
In our store we have new releases of Mica Powders, Rubber Stamps - Textures, Stencils.......and Mixed Media Digital Printables for your projects. Please visit our store Mixedmediasupplies for more details and wide range of stuff.
Here I have used canvas texture sheet and printed the digital paper and the printables. I have distressed using stencil with archival inks and stamped Prima Letters texture stamp and heat embossed with Lindy's Black forest black, edged with Alcohol inks and have used metallic magic paint blue and acrylic white splatters, hand wrote the sentiment and heat embossed the printable with Ranger emboss pen for more dimension.
Few close up shots


Hope you guys like this little share of mine.........stay tuned for more.
Hop on to our store for more supplies and lovely DT share on our blog.
Mixed Media Supplies Blog.
Mixedmediasupplies
Cheers!!
Hema
Here I have used canvas texture sheet and printed the digital paper and the printables. I have distressed using stencil with archival inks and stamped Prima Letters texture stamp and heat embossed with Lindy's Black forest black, edged with Alcohol inks and have used metallic magic paint blue and acrylic white splatters, hand wrote the sentiment and heat embossed the printable with Ranger emboss pen for more dimension.
Few close up shots


Hope you guys like this little share of mine.........stay tuned for more.
Hop on to our store for more supplies and lovely DT share on our blog.
Mixed Media Supplies Blog.
Mixedmediasupplies
Cheers!!
Hema
23.10.17
Mixed Media Fun - Part 2
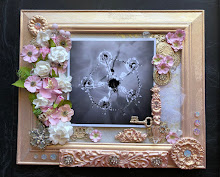
I wanted to make a statement piece for my print. I decided to see what I could accomplish with two frames from DollarTree.

I used a similar paint combination to paint my frame.


After painting the base coloring I used some mixed with Dimensional Magic by Mod Podge mixed with Saphire and then Copper Metallic Mica powder.


While drying the frame I took the glass and using a stencil I used gold, copper and silver sharpies on the back glass of my project.


I added more Mica powder and then framed the print from last week's post.

I was hoping to achieve a light and airy background and frame for my print. I would love to have feedback from all on this piece. Thank you,
Debi
20.10.17
Mixed Media Spooky Banner

You'll need:
Chipboard banner pieces
Background stamps (Mixed Media Supplies)
cardstock - black and off-white (stash)
Gelli plate
butter cream, whipped cream paint (FSJ)
brayer
ink (pumpkin bread [FSJ])
silver embellishments (FSJ)
18 mm wooden beads (stash)
black ribbon (1/4 " wide - stash)
electronic die cutting machine, software
blender tool, blender pads
embossing folder, embossing machine (optional)
Crop-o-dile
Cut the letters and ovals using the electronic machine. (dies and punches could be used or purchased chip letters and oval cuts)
Using the fence background stamp, stamp the ovals using the pumpkin bread ink... ink the edges using the blender tool. If desired, dry emboss with any desired folder.

Grab the Gelli plate and paint. add a couple of dots of each color and blend lightly using a brayer. Stamp the Gelli plate, remove the stamp* and press a banner piece face down into the plate and pull the print. Repeat as desired for each of your banner pieces, adding additional paint and stamping with different stamps as I have done.
TIP: *clean your stamps promptly. I keep a small bucket with about an inch of water in it and place the stamps in there to keep the ink or paint moist until I can properly clean the stamps when I've finished stamping.

Now place the ovals and lettering on the banners as desired. BUT.... Don't secure in place yet!

Using the crop-o-dile, punch 2 holes about 1/4" from the top and side of the banner piece. Wrap a piece of black ribbon around the banner. Adhere two silver embellishments on either end of the oval. Secure the ovals using pop dots centered over the black ribbon and then secure the letter, centered over the oval. I used a pop up for a little more dimension.
Leaving a 6 inch or more length at one end of the ribbon, tie a knot and thread 3 beads, tie a knot and add a banner piece, tying a knot at each hole on the banner piece to keep the banner from sliding along the ribbon, add 3 beads and repeat until all the banner pieces have been used. Tie a knot, add 3 beads, tie a knot and cut leaving a length of ribbon similar in length to the ribbon at the other end of your banner.

Hope this project inspires you in your decorating ideas. Get creative, play -- and check out more creative fun this week on the Mixed Media blog! Thanks for stopping by!
You can always find more ideas on my blog... Stay tuned more posts from the rest of the designers coming this week!

16.10.17
Mica Powder Tag
Hey everyone Suzanne here
I have been lucky enough to have been picked for the Mixed Media Supplies Design Team
Make sure you check out the Facebook Page and Blog to see what projects the Design Team create with the great products that we have
So here is my first project
I made a small tag using the Copper Mica Power and the Crackle background stamp

I used some heat and stick powder with some embossing powder on the little plastic heart
I put a small about of the mica powder in some impasto to give the background some dimension

On my metal embellishment I used some versamark and some heat and stick powder so I could emboss the crackle stamp to add some texture and interest

I did the same thing on the butterfly
- you can also mix the mica powder in clear embossing powder and it will give you the same effect

Thank you for visiting I hope you will be back soon xx
 I have been doing some sort of craft all my life but have found a real love in scrapbooking and mixed media off the page creations...
13.10.17
Mixed Media/Mica Madness!
Welcome!
I am Amber and I am SO excited to be sharing a project with you on the Mixed Media Blog!
I used some fantastic supplies that I will explain - first.... take a look!


Supplies used:
Stamp: Unity (Layers of Life-Create Beauty), SU - Gorgeous Grunge
Ink: Versamark, Tim Holtz Distress Inks in Fossilized Amber, Peacock Feathers, Blackened Soot, (SU)Black Archival
Paper: (SU) Basic Black base (4.25 x 5.5), Vellum, Smoky Slate (3.75 x 4.75),
Whisper White (3.5 x 4.5), Silver Foil
Dies: (SU) Stars
Embellishments: SU - Silver elastic cord, Silver Thread
Embossing Powder: Black
Mica Powder: Silver
Fun Stampers Journey Silks: Silver

I began by stamping my black base in Versamark with a stamp from Gorgeous Grunge - it is just a random "splatter" stamp. I added black embossing powder and heated it, then set it aside. I went to work on my white layer, adding layer upon layer of beautiful distress ink - to give that "night sky look" - I also gave my layer a "shot" of fine water mist in between layers, to add my "star" background. I have to say - I LOVE the Northern Lights - and this card reminds me so much of them!
I used my star pattern rubber stamp in Versamark and then lightly dusted it with the Pearl Mica powder - I added ALOT, as I wanted mega shimmer! Next, I used another star rubber stamp - this time heat embossing it with black powder - and adding more mica! The shine is incredible!
I finally layered it together and added my star cut from Silver Foil and wrapped in thread.
I used my silver elastic cord to bring it all together. There is a TON of shimmer and shine to this design - and the mica powder was the perfect touch!
Thanks SO much for stopping by - and be sure to check out what the Mixed Media Design Team has in store for you all this month! Let e know you stopped in by leaving some love in the comments below!
Love, Peace n' Ink
Amber
I love being in my crafty space. Papercrafting is my passion!
I love peace. I love beauty. I am a mother, grandmother, spouse, artist, daughter, and follower of HAPPINESS. I am a Brave Girl.
9.10.17
Mixed Media Fun Part one - Debi Tullier
I am so excited, to begin my journey with Mix Media Supplies. I decided to do a two-part piece. I began with some evolon plastic paper (I had it on hand.) Please check out the "store" for all your crafting needs. I started building a base for my project. I used a homemade gelatin plate for mono printing. The plate I used is actually over 4 years old. I do have a purchased one but like this one as I can cut it and reform it in the microwave.

Once I spread the paint I used a texture tool to produce the lines that would form the base for my first print pull.


Once my first layer is finished I again spread a new layer out. I use one of the wonderful stamps from Mixed Media Supplies. I love the Chain Link Fence rubber stamp. I used it to produce texture a over the first paint layer. I also used the Crackle Background stamp.

Next I pulled my print again. I love the fun of it all.

I next added more texture with another great stamp. I used the Dark Distress background stamp.

Next, I used a stencil to airbrush some butterflies on the surface. I used the great Metallic Mica powders mixed with Dimensional Magic by Mod Podge to embellish the surface as well.
The second part of this project will be the completion of it and sewing it into my project!

Thank you for joining me!
Best
Debi
6.10.17
Life in Moments
Hi everyone. I'm Jan and I'm excited to share this quick and easy project with you today. This mixed media canvas project just evolved. It started out as something for the upcoming Halloween holiday here in the US, however, it took on a life of its own as I played with the colors and textures a little.
 (No affiliate links are used in this post)
You'll need:
5 x 7 Watercolor Canvas
Gesso
foam brush
Gelli Plate
Clock stencil (Mixed Media Supplies)
Chain Link background stamp (Mixed Media Supplies)
Modeling paste and knife
ink (yellow, pumpkin, and brown were used in this project)
brayer
Wooden Laser Cuts (MelissaFrances-thin cuts)
If you need to prep your canvas, apply a thin coat of gesso. Let dry.
Ink up your Gelli plate with desired colors, using the brayer, blend the colors as desired. Press the canvas into ink and pull. While you still have the ink on the gelli press, place the clock stencil on the gelli press and pull another print. Move the stencil to another part of the press and pull another print, repeat as desired - you can re- ink if you need to. Clean off the stencil -- make sure it is thoroughly dry before storing.


If needed, lightly sand the now dry modeling paste areas. Ink lightly around the edges of the canvas and add a swipe or two across the canvas.
Glue the laser cut words on the front of the canvas as desired. Mount and frame or use as a cover for a mini album.
 Thanks for joining us today as the Mixed Media Design Team continues to share some fun projects this month. You won't want to miss a single post. Be sure to visit the Mixed Media blog throughout the month! Enjoy your own personal crafting and nurturing time and feel free to drop by my blog for additional ideas and projects!


You'll need:
5 x 7 Watercolor Canvas
Gesso
foam brush
Gelli Plate
Clock stencil (Mixed Media Supplies)
Chain Link background stamp (Mixed Media Supplies)
Modeling paste and knife
ink (yellow, pumpkin, and brown were used in this project)
brayer
Wooden Laser Cuts (MelissaFrances-thin cuts)
If you need to prep your canvas, apply a thin coat of gesso. Let dry.
Ink up your Gelli plate with desired colors, using the brayer, blend the colors as desired. Press the canvas into ink and pull. While you still have the ink on the gelli press, place the clock stencil on the gelli press and pull another print. Move the stencil to another part of the press and pull another print, repeat as desired - you can re- ink if you need to. Clean off the stencil -- make sure it is thoroughly dry before storing.


Place the stencil as desired on the canvas and using the modeling paste, apply a thin layer. as seen in the image above. Pull the stencil and repeat. I had a little extra paste left on my knife, so I just swashed it across the canvas in a couple of places. Using the background stamp, impress lightly into the wet texture paste in the upper left hand corner. Be sure to clean your stencil and stamp before the paste dries. Allow your canvas to dry.
If needed, lightly sand the now dry modeling paste areas. Ink lightly around the edges of the canvas and add a swipe or two across the canvas.
Glue the laser cut words on the front of the canvas as desired. Mount and frame or use as a cover for a mini album.

Subscribe to:
Posts (Atom)