Showing posts with label #designteam #mixedmediasupplies. Show all posts

11.7.18

July Welcome

Hi everyone.  Jan here with a fun upcycled bit of porch decor. 
I upcycled another side piece of a deconstructed shelving unit.  The Crackle background stamp from Mixed Media Supplies has always been a favorite of mine.  And even on this big piece, it added just the right touch. 
You'll need paint (Decor Art Multisurface satin- antique white, blue and red and dark gray - wrought iron)
Prep the wood -- I sanded to give the surface a little more tooth for the paint.
I used a based coat of Wrought Iron - let dry thoroughly.

Mark off sections for the "stripes" of color.  Dry brush your colors on.  Let a little of the dark gray wrought iron color show through.  Let dry.  If desired apply another light coat and let dry.


Base coat your letters, mine are 4 inches tall and about 1/4 in thick (Hobby Lobby) The star is about 6 inches in height and has some texture.  I basecoated with the antique white and then applied a coat of Krylon's Hammered copper paint (be sure to apply in a well ventilated area and let dry thoroughly.


Glue the letters and star to the painted base.  Let the glue dry.  For final touches, brayer a light coat of paint onto a portion of the crackle stamp, press lightly to the edges of the board as desired.  It's a nice touch and added just the right amount of texture.
Spray with several light coats of sealer, letting dry between coats.

Thanks for dropping by today and hope you'll set aside some time this week for some creative fun! Would love for you to stop by my blog to see more ideas using Mixed Media Supplies stamps and more. 


27.6.18

Tiny Journal


I love making journals. I also love using premade booklets to customize my own journals. Here is one using the wonderful Micas and digital images that
Mixed Meda Supplies carry.

 I start with a trip to the Dollar Store. You can purchase three of these mini journals for a dollar.

I used this digital image to use as an overlay on my project.


I used chalk paint to do my background. I then sprayed some glitter mist on it.


I used a mix of chalk paint and sealer to coat over my cut outs.
I love my little book and will share the clasp instructions at a later date. Thank you for visiting!
Debi


18.4.18

Mixed Media Tag Background Texture


Hello! 
Today I am using 

I took my unmounted red rubber stamp called Cracked and rolled it around my fingers.  I used Stazon Ink Grey to lightly apply an image randomly on my tag. 

Next, I took a light blue gelato stick and colored in some blue. 
Then stuck some random jewelry, flowers, spring, keyhole, and clock using E6000 glue. 


All of my embellishments were painted white and with my same gelato colored the embellishments. 

Quick and easy texture with Mixed Media Stamps! 


4.4.18

Come Sit With Me

Hi everyone, thanks for stopping by.  I'm so thrilled to be back as a Design Team member for Mixed Media Supplies again this term and I wanted to share this project with you.
You'll need:
cardboard (about 8 x 6), with some of the corrugated areas visible
Printed book paper sheet - stash
Park bench (cut 5 times) - stash
Mica (Sapphire)
Texture Background stamps (bark background, diamond fence background)
ink
markers
e-brush with marker adaptor
leaf and vine punch
acrylic medium
flexible modeling paste
gesso
putty knife
brush
small spray bottle
gelatos (green, blue, lavendar)
white tube paint
flowers
small jewels (flower centers)
word processing program
micron pen - .01 black
Prep the cardboard, remove additional paper if desired exposing more of the ridges.  Apply a light coat of gesso and let dry.


Rub the Gelatos on the gessoed surface.  Using a waterbrush, smooth the color a bit on the surface.  Let dry. Spritz a little of the mica if desired at this stage.

On a palette, shave a little bit of the gelatos and mix with a small amount of modeling paste.  The color should be a little lighter than the surface of your now colored cardboard.  Lightly spread the colored modeling paste for a little more texture on the surface.   Let dry.


Stack the 5 cut benches and let the glue dry thoroughly.  With the bark texture stamp, lightly add some texture to the bench.  I used some black and medium brown ink....
It was pretty stark looking so I dry brushed a bit of white paint on the surface to soften the tone.  Set aside.

Tear the printed book page into strips and using the acrylic medium "glue" to the cardboard as desired.  Apply a light coat of acrylic medium to the surface of the project.  Let dry.  Glue the bench in place on the cardboard.  Let dry.
Using the diamond fence stamp, lightly add the texture to the far right of the cardboard.


Add flowers and leaves and vines as desired on the fence, secure with glue and or acrylic medium.  Using the ebrush and a marker in a very light brown, lightly spray the edges and around the bench and on the book print.... for a little more vintage look.

Add the gems to the flowers, securing additional elements as desired.  Print your sentiment, cut into desired word strips and add a doodled box around each of the word strips. If desired, add a little more color with the eBrush and glue to the base.


When everything has dried, lightly spritz with the sapphire mica for an additional bit of shine.  Sign your work and display as desired.

Thanks again for stopping by the Mixed Media Supplies blog today!  We're excited about the coming term and sharing additional ideas and projects with you.  Enjoy some creative time this week! 


23.3.18

New Egg for Egg Tree

 I love eggs! I keep blown out eggshells in my studio in all times. It was time to add a new egg to the tree! This carton is filled with some of my in progress eggs.


I used some Aleene"s tacky glue for attaching some digital images on my eggshell.


I placed the egg to dry on a skewer.


I then used the airbrush to color the exterior of the egg.


After applying color I then used the Mica Powder to add texture to the exterior of the shell.


I love the way it turned out.


what a wonderful addition to my tree!


Happy Easter to All!


20.2.18

Vibe Journal Page by Suzanne Franin

Hi Everyone Suzanne here

My turn on the blog today and I decided to do a Journal page 
My cousin had posted this picture on Instagram and I loved it (It actually looks like her and she loves all animals) 

So don't forget to check out the Mixed Media Supplies Facebook Page to see what's happening and see what the Design Team are up too and join in on what's happening

I've made a YouTube Video of the process - which is pixelated if anyone can help please leave me a comment so I can sort it out (I've tried everything to fix the issue) 
You can still watch the video it's only a little annoying


I started by adding book paper across the centre of the page tearing it up randomly but keeping the edges of the pages to the straight edges of the rectangle


I used a lined stencil across the middle of the page just on the book paper
I used the Copper Bronze and Sapphire Blue Mica Powder's on the back ground mixing it with water and dripping it down the lines 


I used the Diamond Fence Rubber Stamp randomly over the page


With the Sapphire Blue I made it darker to make it look like the little bird was flying to her


The paper flowers I painted with the Shimmer Pearl and Coral Reef Mica Powder just with a touch of water and when I started drying them the paper started to fluff up so it gave them some dimension


I loved this quote and it's why I added all the extra birds to the page 


Thanks for visiting and I hope you will come back soon xx

1.2.18

Birds nest by Suzanne


Hi Everyone Suzanne here
 
Welcome to the first day of February  
 
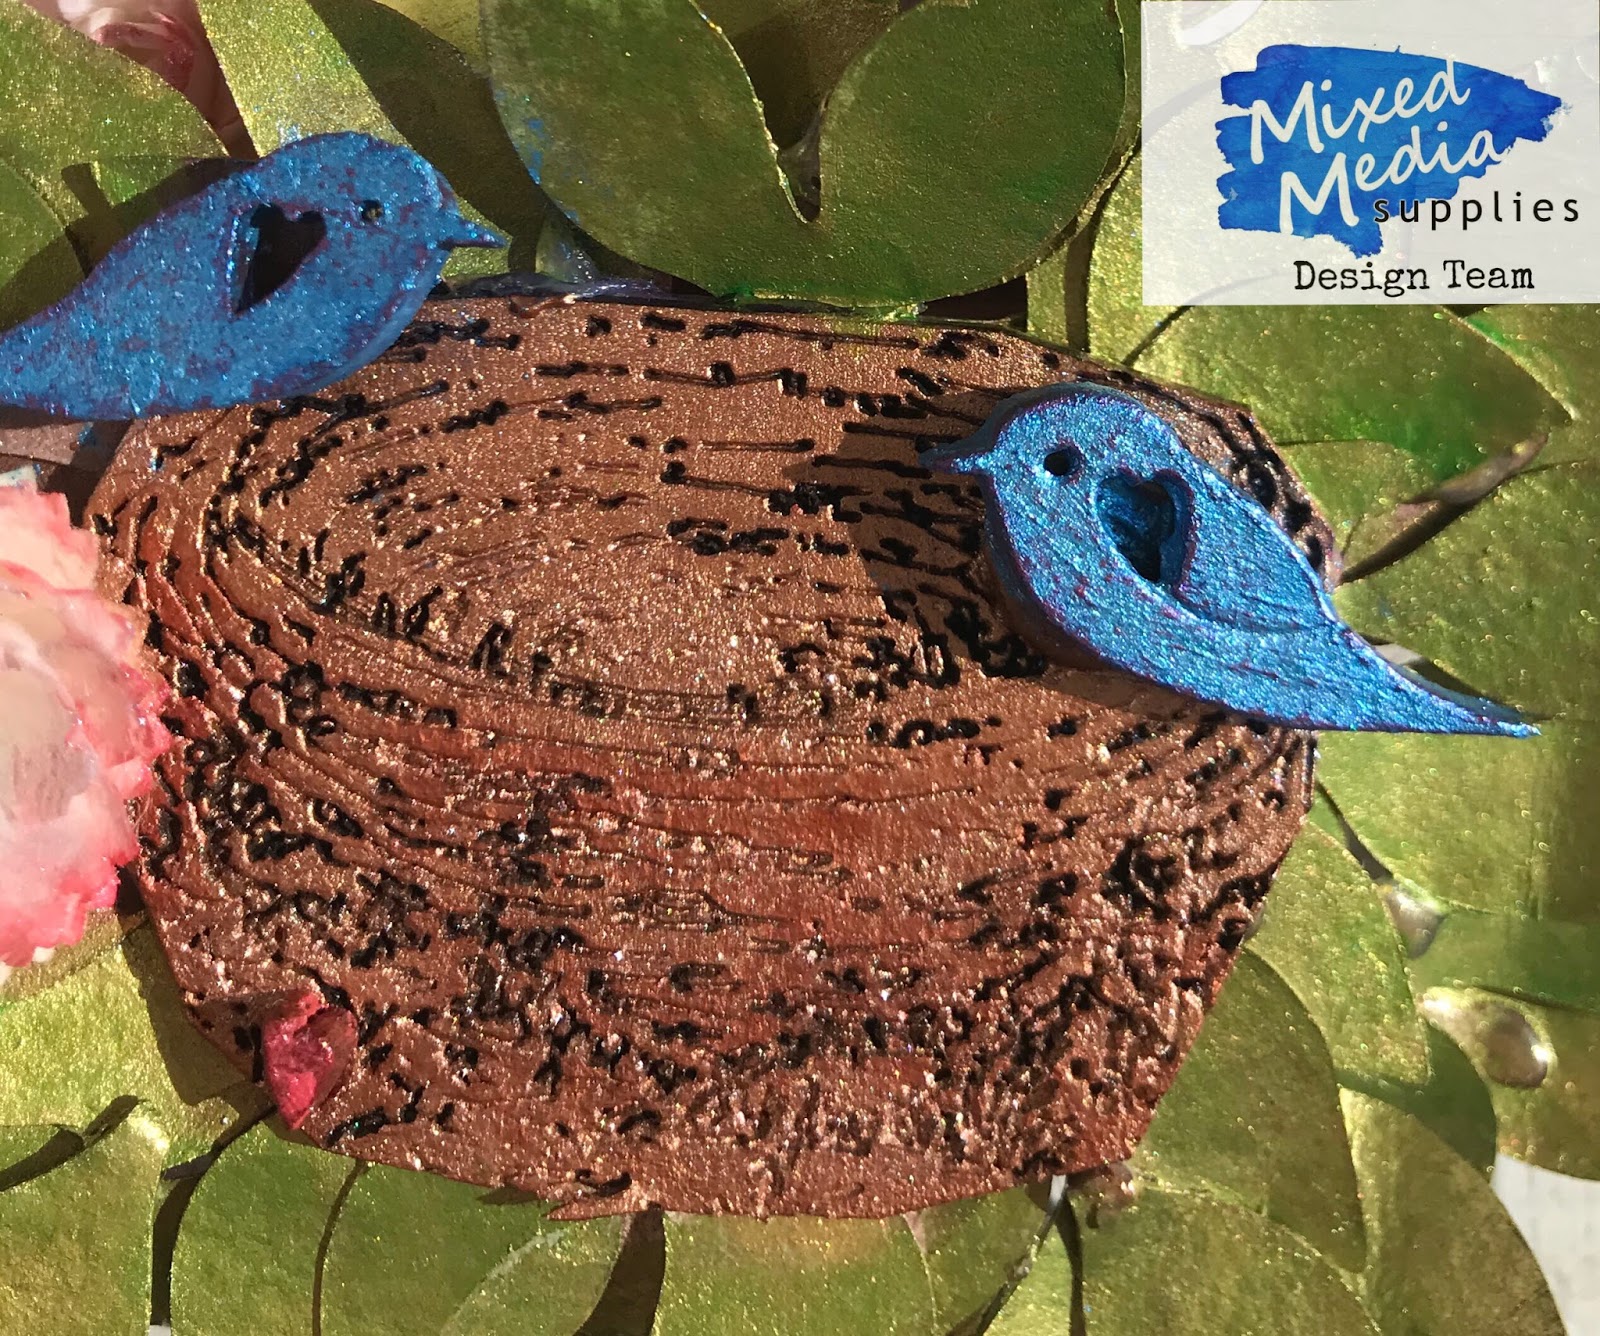
I have all these shadow boxes from the little timber embellishment pieces that I've collected
 
The boxes have piled up and so I had to find something to do with them
 
Here's one I created using a few little birds, a nest, some flowers, stems and leaves I cut out with my scan n cut
 
 
The birds I painted with the Sapphire Blue Mica Powder it's such a vibrant blue
 
The nest is in the Copper Bronze Mica Powder my favourite colour
 
The tiny little heart that is on the nest is the Coral Reef Mica Powder it's so pretty
 You can find all these Mica Powders form the Store
 
 
I also put a little bit of the Coral Reef Mica Powder on the flowers after spraying them with water first so they weren't too bright I just wanted the colour on the edges of the flowers
 
 
On the stems I painted the Shimmer Pearl Mica Powder  unfortunately the camera doesn't pick up the beautiful shimmer that powder gives off


Thanks for visiting and I hope you will come back soon xx

24.1.18

Owl by Suzanne


Hi Everyone Suzanne here


My turn on the blog and this project was lots of fun

Make sure you check out our Facebook page and see what's happening over there
 
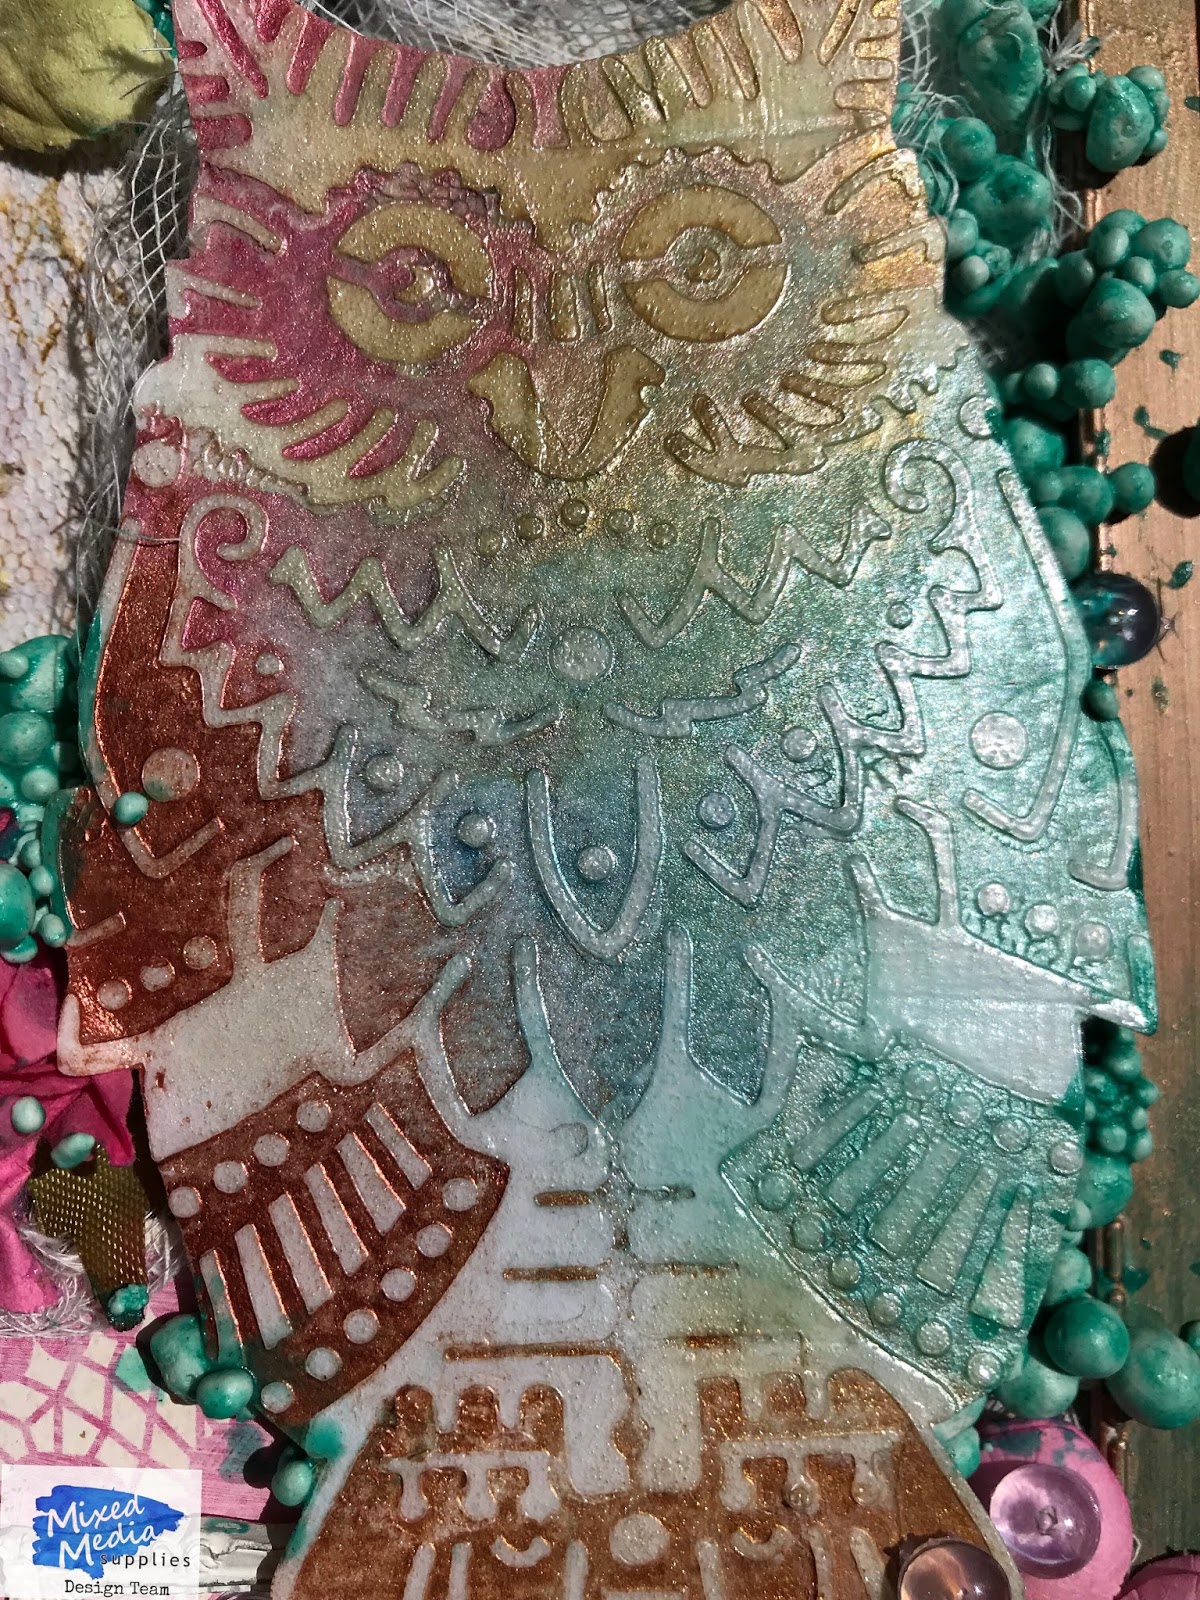
I was lucky enough to get a few bits for Christmas and  one was an
owl stencil of course I had to find a way to use it
  
 
I used the Copper Bronze and Coral Reef Mica Powder randomly over a plastic frame that I had
painted with gesso earlier I then used some Frank Garcia Artisan powder rubbed
into the grooves of the frame to give it the patina look
 
 
I stencilled the owl then used water colour paints and cut him out so I could
raise him up out of the frame
 
 
The background paper I used from one of the Digital Printable Journal Pages we
have on the site I printed it off onto a card stock to add more texture
 
 
I added some lace in the background as well some time the photos don't show
all the details doesn't matter how many you take


And of course flowers are always needed with lots of other little details


Thanks for visiting I hope you will be back soon xx