Showing posts with label #ink. Show all posts

20.2.18

Vibe Journal Page by Suzanne Franin

Hi Everyone Suzanne here

My turn on the blog today and I decided to do a Journal page 
My cousin had posted this picture on Instagram and I loved it (It actually looks like her and she loves all animals) 

So don't forget to check out the Mixed Media Supplies Facebook Page to see what's happening and see what the Design Team are up too and join in on what's happening

I've made a YouTube Video of the process - which is pixelated if anyone can help please leave me a comment so I can sort it out (I've tried everything to fix the issue) 
You can still watch the video it's only a little annoying


I started by adding book paper across the centre of the page tearing it up randomly but keeping the edges of the pages to the straight edges of the rectangle


I used a lined stencil across the middle of the page just on the book paper
I used the Copper Bronze and Sapphire Blue Mica Powder's on the back ground mixing it with water and dripping it down the lines 


I used the Diamond Fence Rubber Stamp randomly over the page


With the Sapphire Blue I made it darker to make it look like the little bird was flying to her


The paper flowers I painted with the Shimmer Pearl and Coral Reef Mica Powder just with a touch of water and when I started drying them the paper started to fluff up so it gave them some dimension


I loved this quote and it's why I added all the extra birds to the page 


Thanks for visiting and I hope you will come back soon xx
8.1.18

Positive Quote by Suzanne

Hey everyone Suzanne here
 
My turn on the blog today
Don't forget to check out our Facebook page and see what's happening over there
I've had this little quote saved for awhile and thought the new year was a good time to use it
We need to start the year off on a positive note
 
"Don't let someone dim your light, simply because it's shinning in their eyes"
 
 
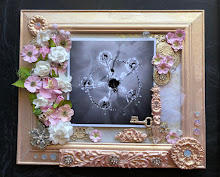
I started with a stencil that had different sized boxes in it and some modelling paste, while the background was still wet I stamped the Chain Link Fence Rubber Stamp from our Store into it so it gave it more texture
 
 
As you can see the paint went into the grooves of the Stamp


I also used the Crackle Rubber Stamp also from the Store


Thanks for visiting I hope you will be back soon xx
 

6.10.17

Life in Moments

Hi everyone.  I'm Jan and I'm excited to share this quick and easy project with you today.  This mixed media canvas project just evolved.  It started out as something for the upcoming Halloween holiday here in the US, however,  it took on a life of its own as I played with the colors and textures a little.
(No affiliate links are used in this post)

You'll need:
5 x 7 Watercolor Canvas
Gesso
foam brush
Gelli Plate
Clock stencil (Mixed Media Supplies)
Chain Link background stamp (Mixed Media Supplies)
Modeling paste and knife
ink (yellow, pumpkin, and brown were used in this project)
brayer
Wooden Laser Cuts (MelissaFrances-thin cuts)
If you need to prep your canvas, apply a thin coat of gesso.  Let dry.
Ink up your Gelli plate with desired colors, using the brayer, blend the colors as desired.  Press the canvas into ink and pull.  While you still have the ink on the gelli press, place the clock stencil on the gelli press and pull another print.  Move the stencil to another part of the press and pull another print, repeat as desired - you can re- ink if you need to.  Clean off the stencil -- make sure it is thoroughly dry before storing.

Place the stencil as desired on the canvas and using the modeling paste, apply a thin layer. as seen in the image above.  Pull the stencil and repeat.  I had a little extra paste left on my knife, so I just swashed it across the canvas in a couple of places. Using the background stamp, impress lightly into the wet texture paste in the upper left hand corner.  Be sure to clean your stencil and stamp before the paste dries.  Allow your canvas to dry. 

If needed, lightly sand the now dry modeling paste areas.  Ink lightly around the edges of the canvas and add a swipe or two across the canvas.
Glue the laser cut words on the front of the canvas as desired.  Mount and frame or use as a cover for a mini album.
Thanks for joining us today as the Mixed Media Design Team continues to share some fun projects this month.  You won't want to miss a single post.  Be sure to visit the Mixed Media blog throughout the month!   Enjoy your own personal crafting and nurturing time and feel free to drop by my blog for additional ideas and projects!