23.11.17

Trapped Life in Cob Webs


Hi Dearies.....

Today is my turn on Mixed  Media Supplies blog.  I have a small recycled Mixed Media Tag to share with you all.  I have used the digital printable from our store and have created this.


I have used Prima Black Heavy Gesso and covered the recycled tag and run through stencil from Expressions Stamps new release, added chippies embossed with Lindy's Black EP, rubbed a bit Prima Wax - Turquoise for extra depth, also dry brushed viva gold on texture for more highlight, also added cheesecloth dry brushed with Fabrika Deckoru's magic paints - Black and Gold and shimmer paint for shine and added gold prills around the tag finally highlighted the printable colored with magic paint and adhered it on to the tag.

More Close up shots


Hope you all like this little share of mine for this week.


Mixedmediasupplies   - Stores

Join us on our blog for more DT share by our talented team.

Happy Crafting!!

Cheers!!

Hema

19.11.17

Raising My Holiday Spirits by Debi Tullier

During the holidays I sometimes get a little down. Family logistics, Poppa not being here, as time goes on,  time does  make big changes. I know that there is one thing that can lift my spirit, Color.  Having color around me brightens my day and my thoughts. So here we go!


I love making tags. I can tie them together, give them as gifts, and just look at them. I love getting lost in the making of them as well.


I started with a tag painted with white and blue acrylic paint. 


I then took one of Mixed Media Supplies Crackle background rubber stamp and stamped silver ink all over it. 


I layered another stamp Dark Distress over the first inking. I used a pink ink.


I used Punchinello with homemade molding paste mixed with Metallic Mica Powder


I then used a chalk to tint the edges and some interior areas of my tags.


I love the digital art sheets that are available from Mixed Media Supply. You can find many digital downloadable images here.


On this tag I also layered over with some wonderful gold paste that I had on hand. I feel that these tags helped my lift my spirits. If the holidays are a little rough for you, sometimes a little time spent relaxing can make all the difference.

Happy Thanksgiving!
Debi


17.11.17

Darkness - Dream


Hi Dearies....

I have been late to post this time as I was not keeping well. Today I have a journal spread to share with you all and I have used Digital Printable's from our store and have created this.

So lets start this small share of work....


  • I have color printed this digital pic on a heavy Watercolor paper. And I have distressed the edges with Brushed Corduroy. 


  • After this I have used Alcohol ink on the ruffled  edges of the water color paper. By mistake a drop of ink fell off on my printed side.....mistake do happen but look further steps how that disappears!!


  • I have used a stencil with modelling paste.


  • After heat setting the modeling paste I have used Fabrika Decoru's Magic paints to paint the journal and here I have used Magic brown, Black and Sunshine yellow. I love the sheen and shine it leaves once you paint them. I have also added some splatters all around.


  • After dry setting the paint I have stamped for more texture with Archival ink black and texture stamps from Prima.


  • I have also printed few more digital images here and will fussy cut them and adhere it to my journal spread.


  • I  have fussy cut them and highlighted with White Gelly Roll pen and Posca pen for highlights. Now our journal spread is all set and ready. I have added a small hand written sentiment. Few close up shares below: 


So this is my share for now.....will be back soon with some more new work.

Kindly share your creations with us and for all the lovely stuff to create....Please visit our store for supplies and for more inspiration...please do visit our blog.


Cheers!!

Hema


Altered Heart

I'm excited to be back for another Mixed Media Design Team post.... I hope you'll find this a fun project!

Not your traditional colors for this time of the year.... but oh, these digital journal pages were perfect for my "faux wood" heart.
(no affiliate links are used in this post, however, I have received some materials from Mixed Media Supplies to use in this post_)


You'll need:
cardboard
paper template, pencil, ruler
masking tape.
printed journal pages (Mixed Media Supplies)
Scissors
Craft knife
Mod Podge® (matte - PlaidOnline.com)
Foam brush (1 inch wide)
digital cutting machine (for words - Sizzix® eclips2 & eCal2)
Lumiere paint,
Mica (blue - Mixed Media Supplies)
Journey Glaze (Fun Stampers Journey)
Glue (Scotch® Brand Quick Dry)

Open the digital journal pages from Mixed Media Supplies.  I did resized and used only one page per printed sheet.  The images were perfect and the resolution was not distorted when I resized to a full sheet printed either landscape or portrait format. 

Cut desired sentiment on your cutting machine.  I chose blessings beyond measure for mine.  Be sure to weld all the letters together if you want one solid word.  The "s" in mine is separate...

Draw a heart shape on the paper.  Cut the shape out and trace onto the cardboard.  Cut the shape using the craft knife.  I didn't want open edges on the sides, so I used masking tape to "seal" the edges as shown in the image below.

Using the paper template, create your design to piece using the printed papers. Number each section and because I something get things turned around, I added an arrow pointing to the top of the cut. 

Cutting one piece from the template at a time, I placed the journal page face down and the template piece face down and traced.  Cut using fine tipped scissors or a craft knife.

Apply a bit of Mod Podge on your cardboard and place your journal page piece in place.  Make sure all edges are sealed.  You can apply a light coat of Mod Podge to the top of the journal page now or wait.  Repeat as needed using the remaining template pieces and Mod Podge. 


Let dry overnight.  Apply a coat of Mod Podge over the entire front of the piece.  Let dry.  I had a couple of areas that I wanted to add a little more distress to, so I sanded them just a little.

The Lumiere paint was next and with a small brush, I put a little bit here and there and around the edges of the entire heart for a little 'glow.'  I also used the paint on the lettering.  Let dry.  Glue the lettering as desired on the front of the heart.

Add some additional bling if desired with some mica and small accent pieces using some Glaze.  Let dry and sign your creation!

Hope you'll be spending some time in your crafting space this week... Be sure to stop by the MixedMediaSupplies blog for more designs from the team this month.  I'm sure you won't be disappointed. 


15.11.17

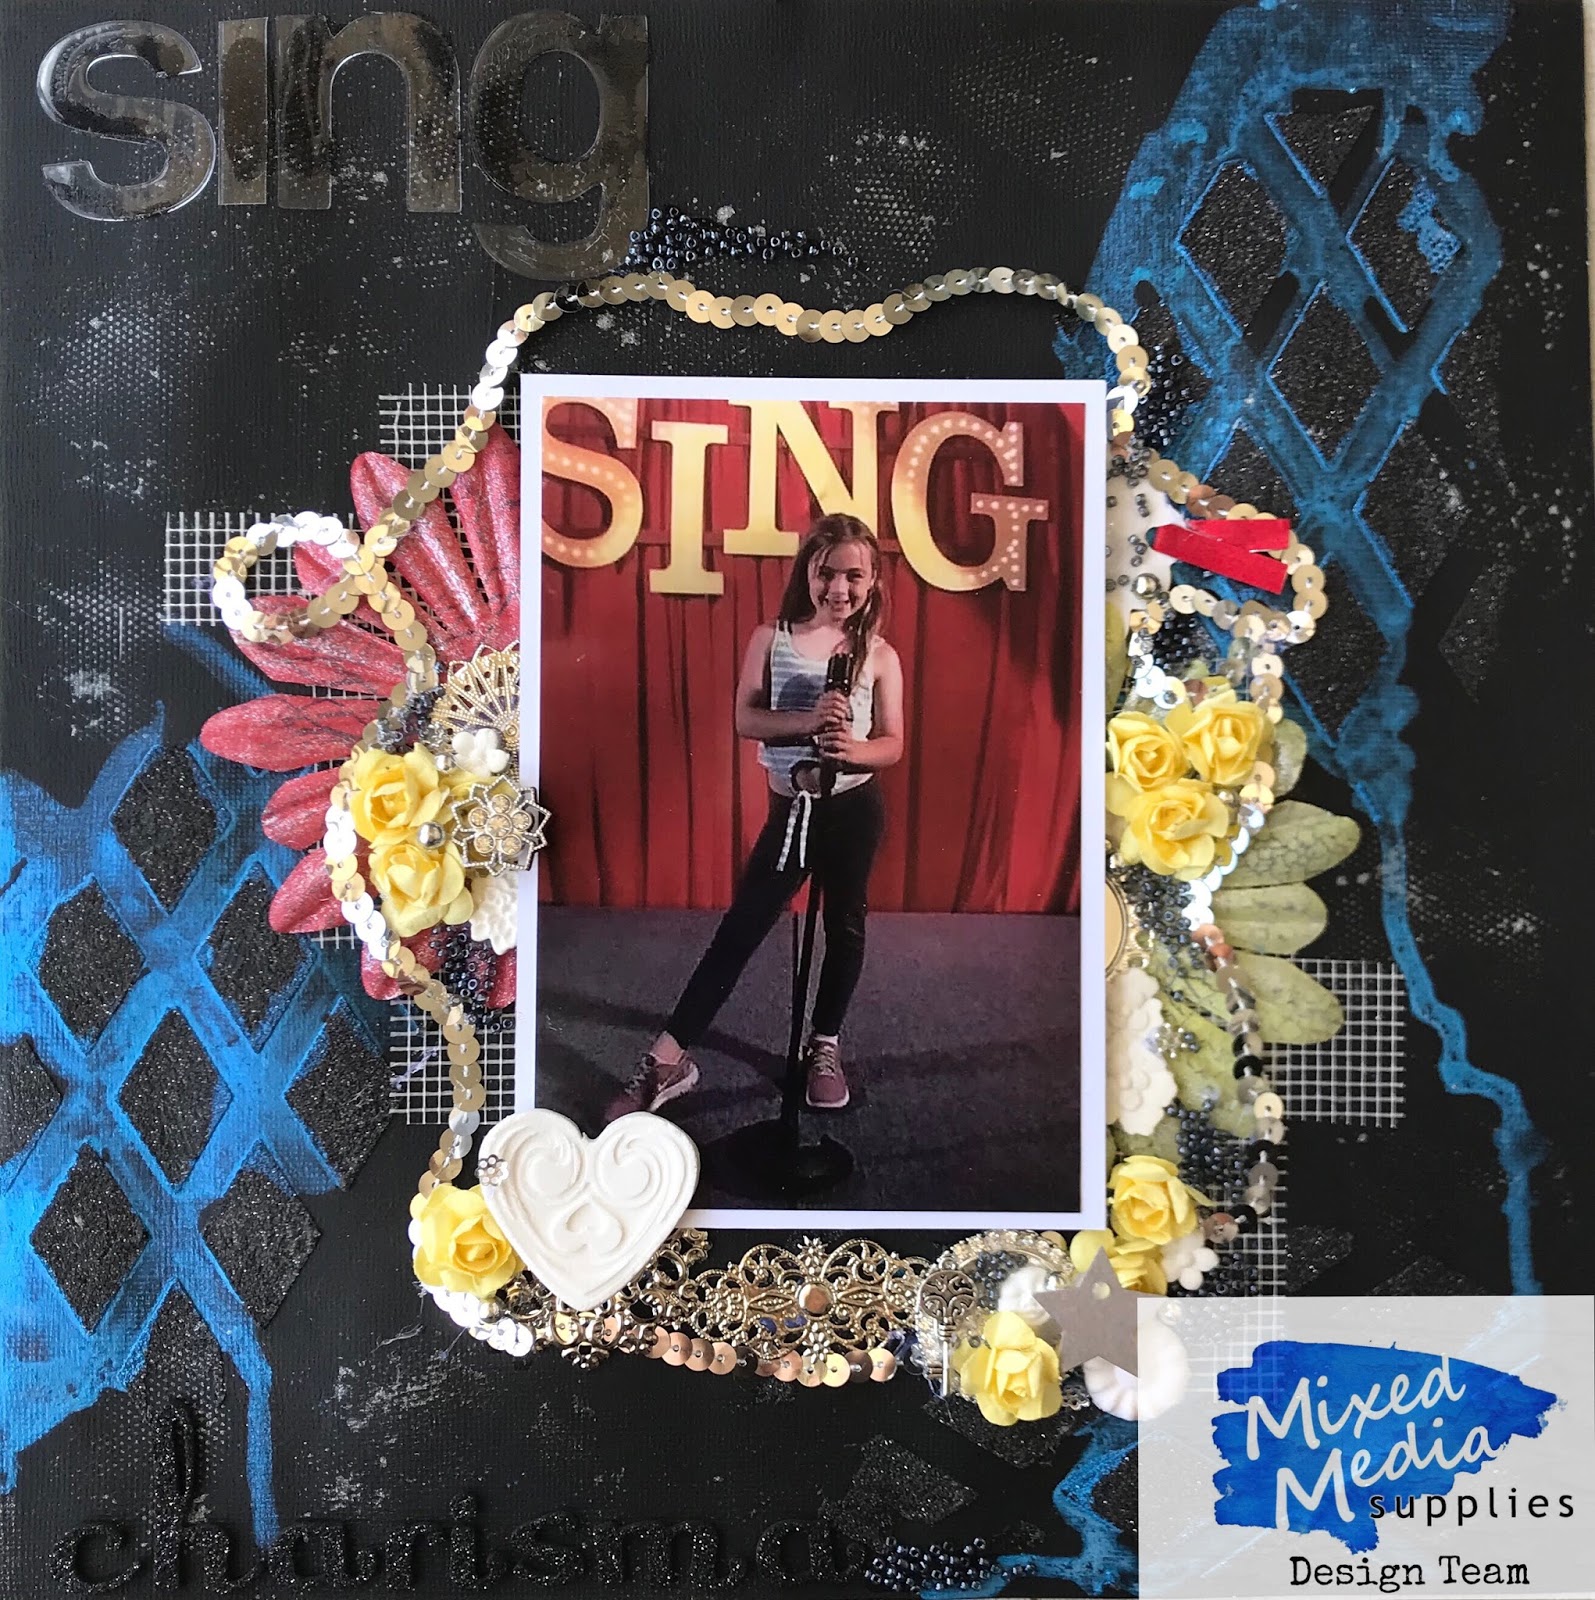
Sing Layout by Suzanne Franin


Hi everyone Suzanne here

I created a layout using a few of our products - Mica Powders and Rubber Stamps which you will find on our WEBSITE

Make sure you check out our Facebook Page and our Blog and see what the rest of the Design Team are up too

I started off using some gesso on the background cardstock then I used the Saphire Mica powder mixed with watered down mod podge and dripped it down the page to make sure it went through the stenciled pattern


Then I mixed some Pearl Mica Powder with the same mix of water and mod podge and spread it on my mat so I could stamp into it 


With my flowers I stamped using the Diamond Fence and the Crackle background stamp to give an extra dimension to them
I also painted them with some of the Pearl Mica Powder mix I made


Here's my layout 


I used some graphite paste through a diamond stencil for a bit more shimmer


Then used a few embellishments - from metal, flowers, sequins and beads to add dimension and texture


Thanks for visiting I hope you will be back soon xx

12.11.17

Altered book cover...Check out my latest blog using mixed media supplies....thanks ☺️🦋
#mixedmediasupplies #alteredbookcover

6.11.17

Paper Fabric

Jan here with a fun project featuring the NEW Mixed Media Supplies Digital stamps!  Loved the rose and knew that I had to do something fun with it.  This is part 1 of a 2 part project. 
You'll need:
lightweight muslin
tissue paper
digital stamps  (Mixed Media Supplies)
background stamps (Stampin Up!- retired)
inks (dye)
Soft brush
glue and water
Printer (I used a laser printer)

Stamp tissue paper with desired background stamps.  Choose and size the digital stamps as desired.  Attach tissue paper to some copy paper and run through the printer.  Set stamped images aside.

Lightly dampen your muslin with some water.  Drop a few drops of ink on the muslin and spread the ink using the brush.  You can add additional ink/color if desired.  Let dry.  Iron to set the color.
n a small container, mix equal parts of glue and water.  Using a clean brush, apply a light layer of the glue mixture and add a tissue paper image.. I tore pieces and applied.  Then brush over the tissue paper to seal.  Make sure to get as many of the bubbles if any out and be sure to brush all the edges as well.  Let dry.  Apply additional layer as desired.  You can add additional color is desired.  Let dry.  The material may be a little stiff.  Play with it, crumple it and the more you handle it the softer it becomes.  It is very pliable. 


 I added some additional color after the roses were added.  I can't wait to do the next steps in this project... you can find those details on my blog in the next day or so.  Stay tuned for more fun projects from the Design Team.  You won't be disappointed! 

3.11.17

Cluttered Mind ATC

I  love ATC's. They are fun, compact and can be used to experiment on techniques in a smaller way. I have, like many others a bunch going on. My mind is cluttered and so is my ATC! It is a way to release some stress and have some fun doing it. Mixed Media Supplies has so many goodies to help me express myself.

Supplies:
Playing Card
Digital Image sheets from http://www.mixedmediasupplies.com/
Molding Paste
Gesso
Embossing stamp pad
Rubber Stamp Chainlink Fence
Airbrush Marker Machine/Stampin Up/Tim Holtz tool as well
Spectrum Noir Markers
Sharpie Gold marker
Glitter


I started with a regular playing card. I have stacks of them. I primed it with white gesso.


Next, I trimmed several of the digital image sheets available from Mixed Media Supplies.


 I began to fill the background with color.  I used an airbrush marker tool to do so. I also have on hand Spectrum Noir Markers.


I used stencils that I had on hand to put in some additional elements in my composition.


I used colored pencils to fill in some of my collage images for my ATC.


It is a very rewarding and relaxing time spent in crafting!


Ready to put all of the elements together!


I used Mica powder mixed in molding past for the textured
areas.  I also used it in the Embossing stamp area along with some glitter.  I really enjoy the completed
card.